
A fresh Windows install is fast. Six months of normal use later, the same hardware feels lethargic: boot times stretch, apps open slowly, and the fan spins when nothing obvious is happening. None of that is inevitable, and none of it requires a full reinstall. Work the cleanup steps below in order of impact, starting at the top.
Step 1: Disable startup apps that you didn’t ask for
This is the single highest-impact change for most systems. Every application you install tries to add itself to the startup list. Most of them don’t need to be there at all, they can be simply summoned when needed. apps like Spotify, Discord, Steam, OneDrive, Teams, your GPU software suite, printer utilities, they all load at boot whether you use them that session or not all while consuming RAM and extending the time between pressing the power button and having a usable desktop.
Open Task Manager with Ctrl + Shift + Esc, go to the Startup apps tab, and look at the Startup impact column. Sort by impact. Anything marked High that you don’t need running before you manually open it should be disabled. Right-click and select Disable, this doesn’t uninstall the app; it just stops it loading automatically every time you start your machine.

Things worth keeping enabled: your antivirus, any hardware monitoring software you actively use, OneDrive if you rely on it for active file sync. Things safe to disable for almost everyone: Spotify, Discord, Steam, Epic Games Launcher, any manufacturer utility you don’t actively use, browser update helpers, and any app listed as Unknown with High impact.
Step 2: Remove apps you don’t use
Go to Settings → Apps → Installed apps. Sort by size. Work through the list and uninstall anything you don’t recognise or haven’t opened in months. Pay particular attention to manufacturer-installed software if you bought a pre-built, these machines frequently ship with trial software, redundant system utilities and promotional applications that serve no purpose at all for you, for them it’s a chance at selling you something you might need. think of these as brochures, if they interest you then keep them, if not, it’s best to get rid of them.


Windows itself ships with apps that not everyone uses. The Xbox app, Clipchamp, Tips, and various Microsoft apps can be removed through Settings → Apps if you have no use for them. Removing them frees storage and reduces un wanted background activity.
Step 3: Clean up storage properly
Windows has a built-in tool that most people underuse. Open Settings → System → Storage → Cleanup recommendations. This surfaces temporary files, old Windows update files, and items in the Recycle Bin. Run it and clear what it finds, anything raised here is NOT needed but kept for “just in case”.

For a more thorough clean, open Disk Cleanup by searching for it in Start, then click Clean up system files once it loads. The additional category this unlocks, Previous Windows installations, can reclaim several gigabytes on systems that have been updated through major Windows versions. This is safe to delete once you’ve confirmed the current Windows version is stable.

Storage Sense, found in Settings → System → Storage, automates ongoing cleanup. Enable it and configure it to run monthly. Set it to delete temporary files and empty the Recycle Bin automatically. This handles the passive accumulation of clutter without requiring your manual attention.
Step 4: Check what’s running in the background right now
Open Task Manager and go to the Processes tab. Sort by CPU and then then by Memory. Look for anything consuming significant resources when you’re not actively using it. Common culprits: browser background processes running after you’ve closed the browser, game launcher update checkers, cloud backup software running an unscheduled sync, and Windows Search indexing, which is normal but can be scheduled to run during idle periods rather than while you’re working.
If you see a process, you don’t recognise consuming significant resources, right-click it and select Open file location. That shows you exactly where it lives on your system and gives you enough information to identify whether it’s legitimate or worth investigating further or even disabling entirely.
Step 5: Fix your power plan
Windows defaults to Balanced power mode on many systems, including desktops where there’s no battery to conserve. Balanced mode reduces CPU clock speeds when demand is low and ramps them on demand, a process that introduces latency in games and interactive tasks. this works great on a laptop where battery life means everything, but on a PC plugged into a wall, the chances are you need it running at its most powerful especially when you are working and especially when you are gaming.

Search for Power plan in Start and open Choose a power plan. Select High performance. On AMD systems, the AMD Ryzen Balanced plan that installs with the chipset drivers is better than Windows Balanced and better than Windows High performance for Ryzen CPUs specifically, it understands the processor’s boost behaviour in a way the generic Windows plans don’t. Check that it’s installed via the Ryzen Master utility or chipset driver package and use it if it’s available.
Step 6: Clear browser cache and extension clutter
Browsers accumulate cached data that can reach several gigabytes over months of use. In Chrome: Settings → Privacy and security → Delete browsing data → select Cached images and files, set the time range to All time, and clear it. In Firefox: Settings → Privacy & Security → Cookies and Site Data → Clear Data. This doesn’t log you out or remove passwords, it clears temporary files only so there’s no risk here.
While you’re in browser settings, review your extensions. Extensions run on every page you open and consume RAM proportionally. Remove anything you installed for a one-time use or don’t actively rely on.

Step 7: Defragment HDDs, optimise SSDs
If you have a traditional spinning hard drive: search for Defragment and Optimise Drives in Start, select the drive and click Optimise. Windows should be doing this automatically on a schedule, but running it manually confirms it’s been done recently and you can rest knowing it had been done.
If you have an SSD: do not defragment it. The Optimise function for SSDs runs TRIM instead, which is correct and takes seconds. Defragmenting an SSD causes unnecessary write cycles without any performance benefit. we often wonder why Microsoft still shows this as an option in windows with an SSD installed.
Step 8: Update drivers selectively
Outdated drivers can cause instability and missed performance. Update these specifically: GPU drivers via the Nvidia App or AMD Adrenalin, chipset drivers from AMD or Intel’s website directly, and network adapter drivers if you’ve had connectivity issues. Avoid third-party driver updater software, these tools frequently install incorrect driver versions and some are outright adware.
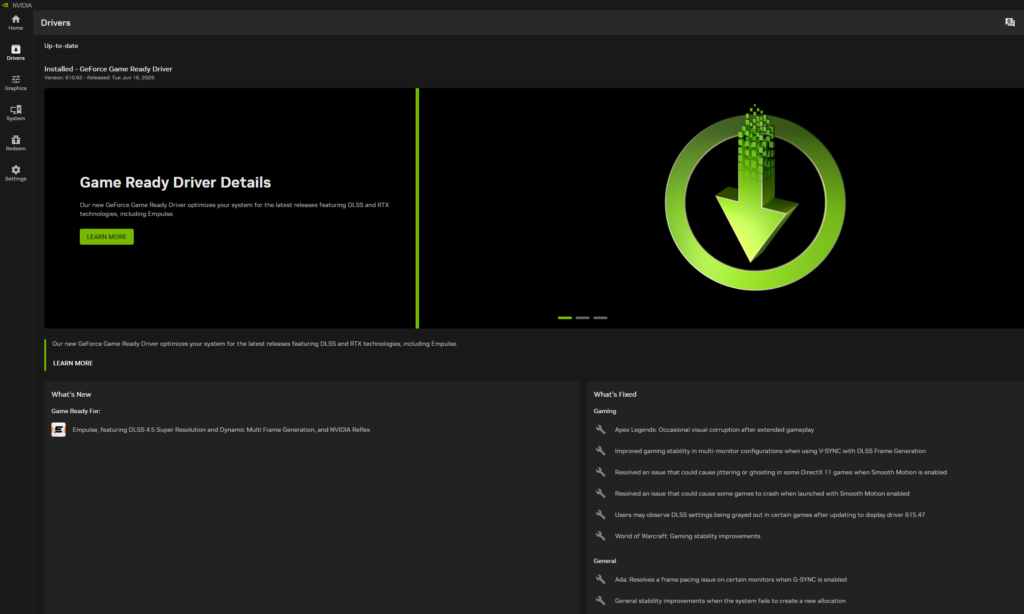
Windows Update handles most system drivers adequately. The GPU and chipset drivers are the ones worth managing manually.
What not to do
Registry cleaners cause more problems than they solve. Tools like CCleaner’s registry section, Advanced System Care, and similar utilities make changes that can break software in non-obvious ways. The performance gain from registry cleaning is zero on a modern system. Skip them entirely.
RAM boosters and memory optimisers are snake oil. They typically work by forcibly clearing memory that Windows has cached for performance reasons, then presenting that cleared cache as “freed RAM.” The result is slower application load times, not faster ones. Windows manages RAM more intelligently than any third-party tool so don’t be tempted to use these if you are low on RAM.
After completing all steps
Restart. Boot time should be noticeably shorter if startup apps were the primary issue. Application launch times improve as RAM is no longer contested between startup processes and what you’re actively using. Storage space recovered from steps 3 through 6 is immediately available.
These steps are worth repeating every three to six months. The accumulation is gradual, startup entries, cached data, unused applications, and a periodic cleanup session keeps the system running at its installed hardware’s actual capability.