
A system that boots into Windows and runs games isn’t necessarily stable. Stability means consistent behaviour under the sustained, maximum-load conditions that gaming, rendering, or any intensive workload creates. A system that’s 95% stable crashes once a week for no apparent reason, corrupts a save file, or drops out of a game an hour in. Those problems have causes that stress testing exposes before they become a habit.
This guide covers the right tools for testing CPU stability, GPU stability, and RAM stability, how long to run each test, exactly what to look for, and what a pass actually means. The full process takes a few hours but only needs to be done when you build a new PC, change overclocking settings, upgrade hardware, or start experiencing unexplained crashes.
Why Stress Testing Exists
how to stress test PC in Real-world gaming loads don’t push every component to its absolute maximum simultaneously. They’re dynamic frame rendering is intensive, then a menu pauses everything, then a complex scene hits, then a quiet area follows. This variation means a system can pass dozens of gaming sessions without hitting the specific combination of load, temperature, and duration that exposes an underlying instability.
Stress testing removes that variability. It runs each component at sustained maximum load for long enough to reach thermal equilibrium the point where the heat being generated exactly matches the heat being removed by cooling. A system is only genuinely stable if it holds that equilibrium without errors for the full test duration.
When to stress test:
- After building a new PC
- After enabling XMP/EXPO for the first time
- After any Ryzen Master PBO, Curve Optimizer, or Intel XTU tuning
- After replacing a CPU cooler or adding case fans
- When experiencing unexplained crashes, blue screens, or freezes
- After a new RAM kit installation
If none of these apply, you don’t need to stress test. A stable stock system that games reliably doesn’t need to be tested on a schedule.
Test in This Order
This sequence matters. RAM errors cause crashes that look like CPU or GPU failures. Testing RAM first means you don’t waste hours diagnosing the wrong component.
- RAM first — MemTest86
- CPU second — Prime95 or Cinebench
- GPU third — FurMark or 3DMark
- Combined CPU + GPU — OCCT or simultaneous Prime95 + FurMark
Step 1: RAM Testing with MemTest86
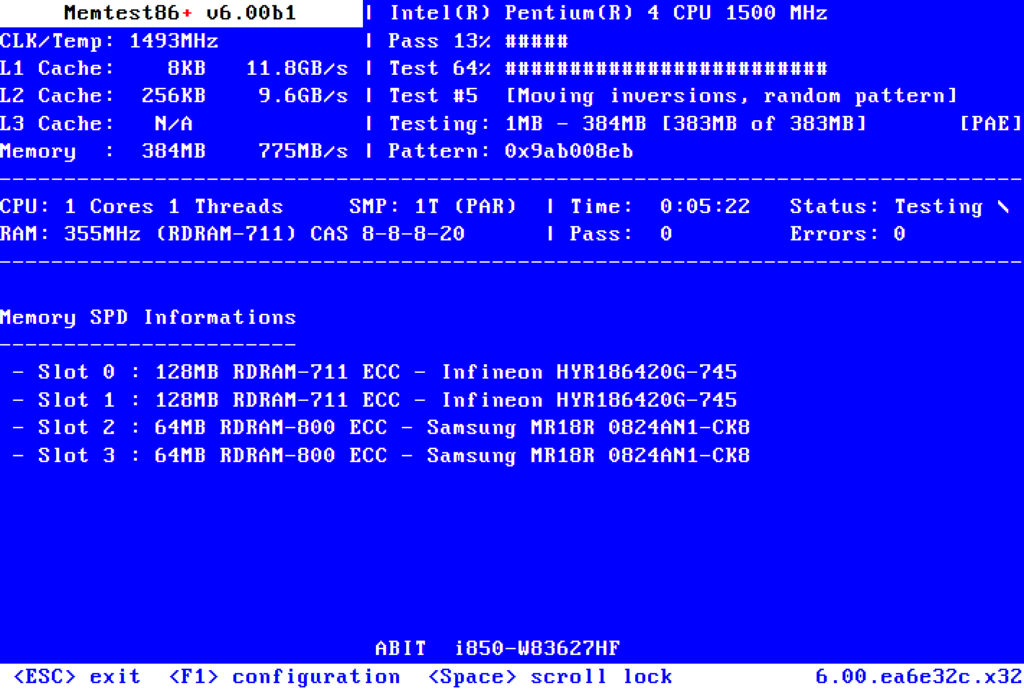
What it is: MemTest86 is a RAM stability tester that runs outside Windows, booting from a USB drive. It’s the only way to test all of your RAM, because Windows occupies part of RAM while it’s running — making it unable to test its own memory fully.
Why it matters: Unstable RAM is one of the most common causes of intermittent system crashes, blue screens, and corrupted files. An XMP/EXPO profile that looks stable in Windows can have RAM running at timings or voltages that cause occasional errors under load. MemTest86 catches these before they cause real problems.
Download: memtest86.com — free version is the one you want. It creates a bootable USB image.
How to run it:
- Download MemTest86 and use it to create a bootable USB drive (the installer handles this)
- Restart your PC, enter BIOS, and set the USB drive as the first boot device
- Save and exit — your PC will boot into MemTest86 automatically
- Let it run automatically — it will start testing immediately
How long: One full pass covers all available RAM using multiple test algorithms and takes approximately 45–90 minutes depending on how much RAM you have. One pass is sufficient to catch most instability. Four passes provides near-complete confidence.
What to look for: Any errors appear highlighted in red. A single error means the RAM is not stable in its current configuration. This isn’t necessarily a failed RAM stick it can mean the XMP/EXPO profile is too aggressive for your specific hardware combination.
If you get errors:
- First try: reseat the RAM sticks (remove and firmly reseat in the correct slots — usually slots 2 and 4 from the CPU)
- Second try: disable XMP/EXPO in BIOS, retest at JEDEC defaults — if errors disappear, the profile is the problem
- Third try: test one stick at a time to isolate a failing module
- If errors persist at JEDEC defaults with a single stick, that module may be faulty
Step 2: CPU Testing with Prime95
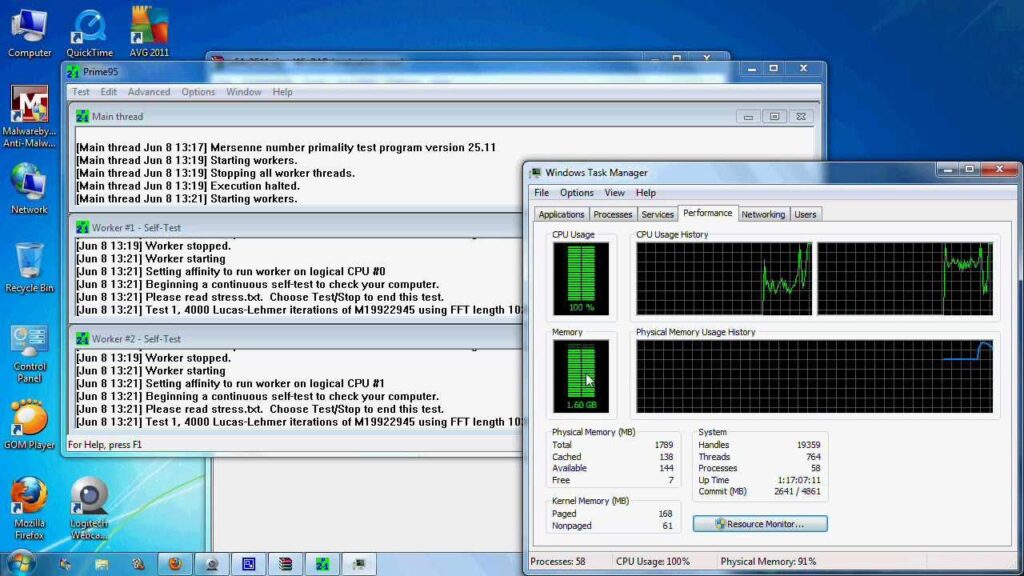
What it is: Prime95 is the gold standard for CPU stress testing. Originally a prime number calculator, it generates sustained computational loads that push the CPU harder than any real game or application ever will.
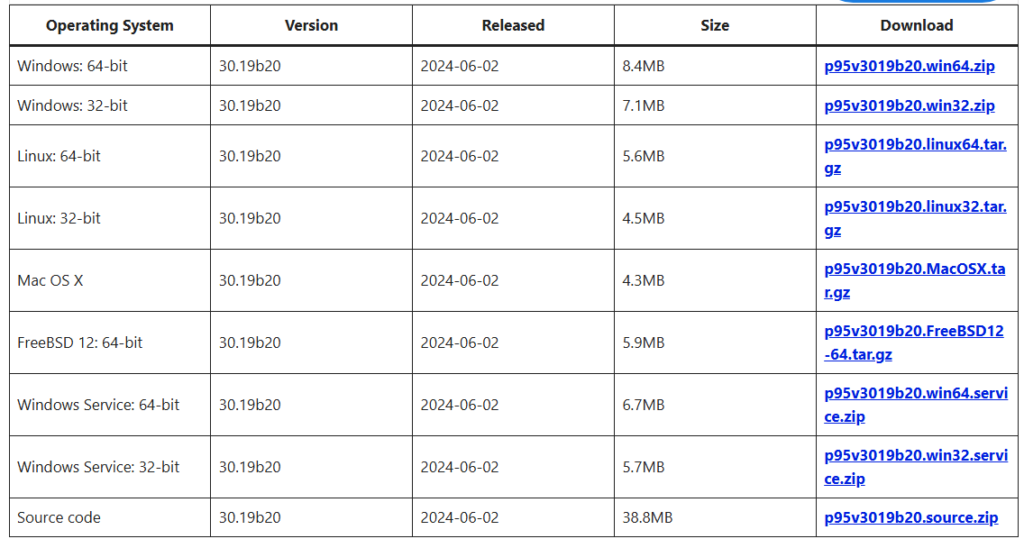
Download: — Prime95.com
How to run it:
- Open Prime95 and select “Just Stress Testing”
- Choose your test mode (see below)
- Let it run while monitoring CPU temperature and clock speed in HWiNFO64 or MSI Afterburner
Which test mode to use:
Small FFTs — Tests the CPU’s arithmetic execution units at maximum temperature. Generates more heat than any real application. CPU temperatures during Small FFTs will be higher than anything you’ll see during gaming this is intentional and not a problem. Use this to confirm your cooling can handle worst-case thermal conditions.
Blend — Tests both CPU execution units and the memory controller together, running a mix of small and large FFTs. Slightly lower temperatures than Small FFTs but a more comprehensive test of the CPU’s interaction with RAM. This is the test to use for validating stability after overclocking.
Important caveat about AVX: Modern versions of Prime95 use AVX (Advanced Vector Extensions) instructions by default, which generate significantly more heat than standard gaming workloads. Some processors particularly Intel 13th and 14th Gen unlocked chips run substantially hotter during AVX Prime95 than during any game. If your CPU passes Prime95 Small FFTs with AVX active, it’s extremely well-tested. If temperatures are alarmingly high during AVX testing but stable during gaming, this is expected behaviour AVX is testing beyond what games typically demand.
How long:
- Quick stability check (minor tweaks): 30 minutes Small FFTs — catches obvious instability
- Standard validation (new build or overclock): 4–8 hours Blend
- Professional confidence: 24 hours Blend or longer
What to look for: Prime95 worker threads show results in real time. An error message reading “FATAL ERROR: Rounding was X, expected less than X Hardware failure detected” means the test failed. The worker thread will stop. Any crash, blue screen, or system restart during Prime95 also counts as a failure.
What a Prime95 pass means: A CPU that completes Prime95 Blend for 4+ hours without errors is genuinely stable under sustained maximum CPU load. That’s a meaningful confidence level — significantly higher than “it booted and played games.”
What a Prime95 pass doesn’t mean: A pass proves CPU stability in isolation. It doesn’t test GPU or PSU stability under combined load. That’s what the final combined test covers.
Cinebench for Quick Performance Checks
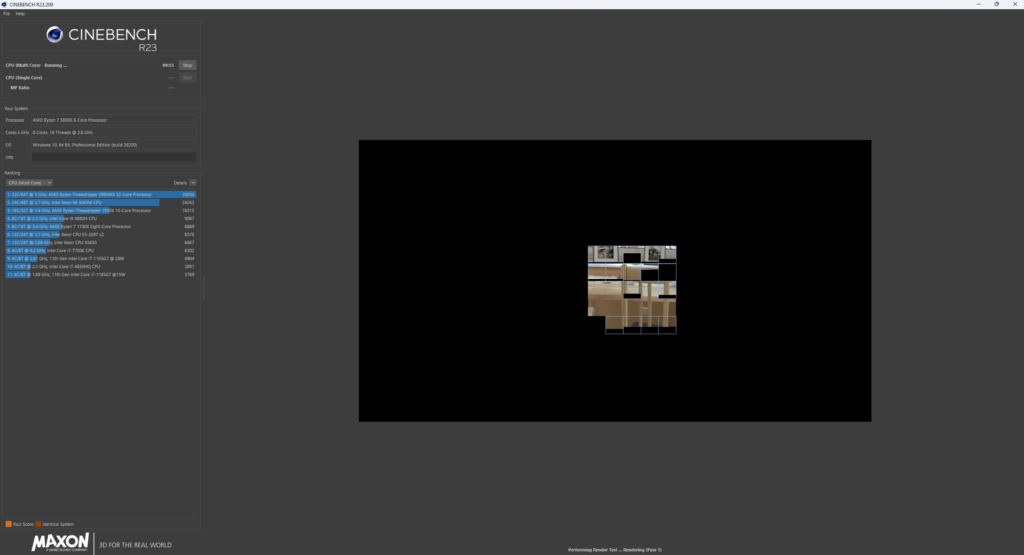
Cinebench 2024 is a 3D rendering benchmark, not a stability test. It runs for approximately 10 minutes and measures performance rather than testing for errors. A single Cinebench 2024 run won’t catch subtle instability that takes an hour to surface.
Use Cinebench to:
- Quickly compare CPU performance before and after PBO or XTU tuning
- Confirm a CPU is running at its expected performance level
- Check that single-core and multi-core scores match expected values for your processor
Don’t use Cinebench as a substitute for Prime95 if you’re validating an overclock or new build. It’s a performance measurement tool, not a stability validator.
Step 3: GPU Testing with FurMark
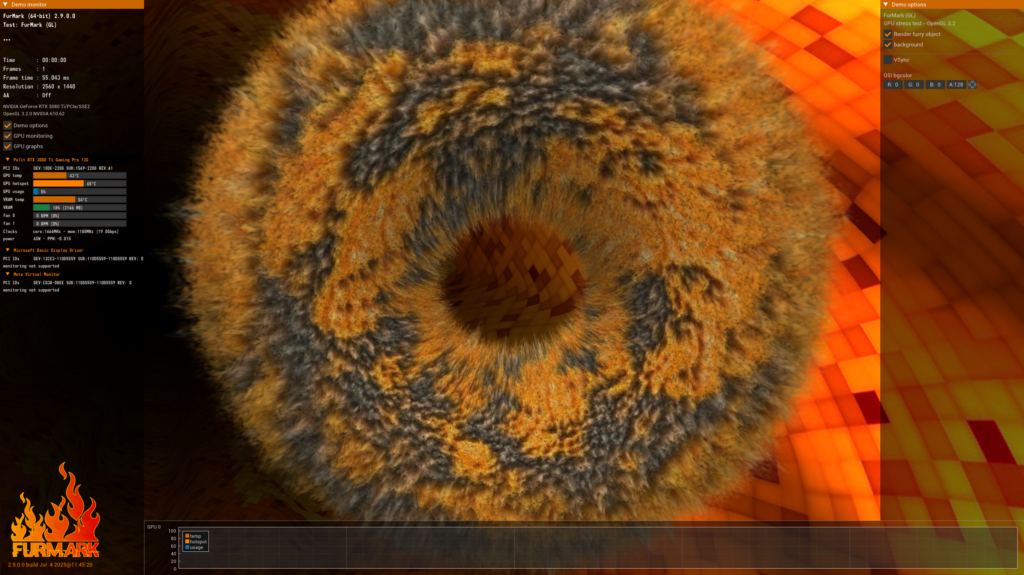
What it is: FurMark renders a spinning donut shape covered in rendered fur — a synthetic workload that pushes GPU compute utilisation and power draw to absolute maximum. If your GPU survives FurMark without visual artifacts, crashes, or driver resets, it can handle anything a game will throw at it.
Download: geeks3d.com/furmark — free.
How to run it:
- Open FurMark and click GPU Benchmark or Burn-in Test
- Set resolution to your monitor’s native resolution
- Enable “GPU Temperature Graph” to monitor temperature during the test
- Start the burn-in test
- Keep HWiNFO64 or MSI Afterburner running alongside to monitor temperatures
How long: 15–30 minutes is sufficient for most purposes. If your GPU survives 30 minutes of FurMark without incidents, it’s stable under any gaming workload.
What to look for:
- Visual artifacts coloured squares, flickering lines, wrong-coloured pixels, missing geometry. Any of these mean instability.
- A black screen followed by “display driver has stopped responding and has been recovered” a driver crash indicating the GPU became unstable
- System restart or shutdown the GPU overheated or the PSU failed to deliver sufficient power
What a FurMark pass means: Your GPU’s cooling, power delivery, and silicon quality can handle maximum sustained load.
Important caveat: FurMark generates more power draw than any real game some GPU manufacturers specifically designed their power delivery to allow more sustained draw during games than FurMark’s synthetic pattern. A GPU that passes FurMark for 30 minutes will handle any game. A GPU that fails FurMark isn’t necessarily defective it may have hit a FurMark-specific power spike that its power limit circuitry wasn’t designed to accommodate. If FurMark causes driver crashes but gaming is stable, the GPU hardware is likely fine and the FurMark load pattern is hitting an edge case. Try Unigine Heaven as an alternative it renders a detailed 3D scene that more closely resembles a real game workload.
GPU temperatures during FurMark:
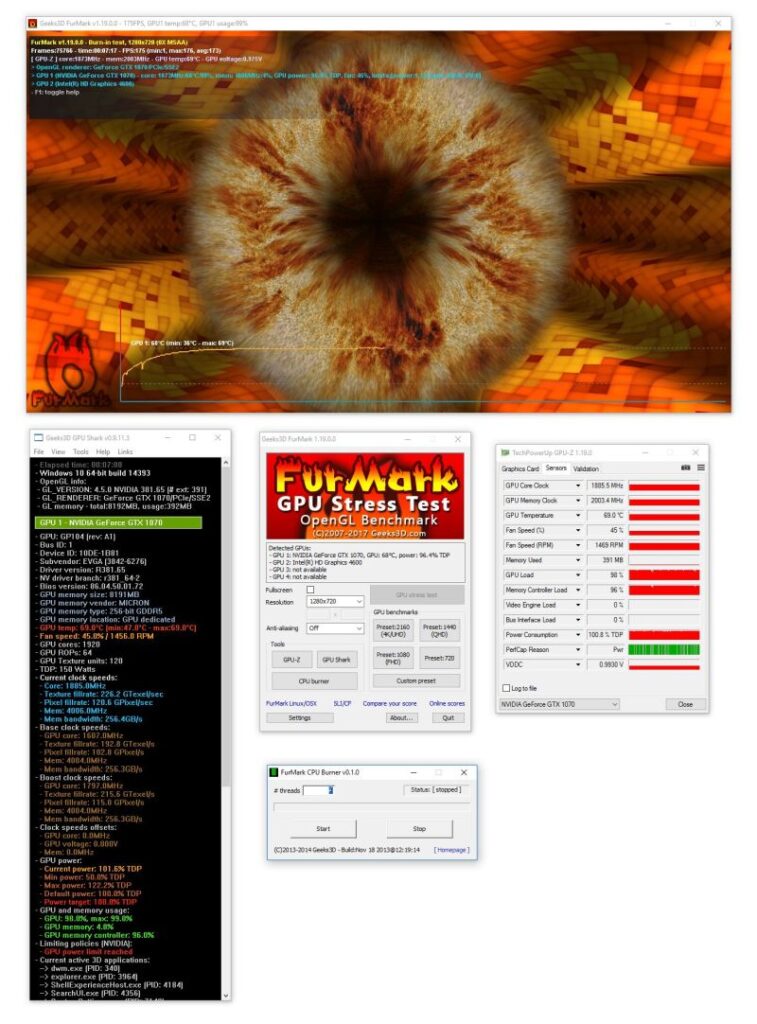
- Desktop GPUs: up to 85°C core is completely normal during FurMark
- AMD RDNA 3 and 4: hotspot readings of 100–110°C during FurMark are within AMD’s design spec and are not errors
- Sustained core temperatures above 90°C combined with clock speed drops indicate thermal throttling — improve case airflow or check your fan curve
Step 4: Combined CPU + GPU Testing
This is the step most guides omit, and it’s the step that catches problems the individual tests don’t.
When both CPU and GPU are under simultaneous full load, they draw maximum power at the same time. This tests your PSU’s ability to deliver stable voltage to both components simultaneously. A CPU that passed Prime95 in isolation might become unstable when the GPU is also pulling 300+ watts through the same power supply because the PSU is now delivering more total current than it was during the CPU-only test, causing voltage sag on the 12V rail.
How to run it:
- Start Prime95 in Blend mode
- Wait 2–3 minutes for it to fully load the CPU
- Launch FurMark with burn-in test active
- Both tools now run simultaneously, maxing out CPU and GPU together
- Run for at least 15–30 minutes while monitoring temperatures and clock speeds in HWiNFO64
Alternatively: OCCT (OverClock Checking Tool) has a dedicated “Power Supply” test mode that loads CPU and GPU simultaneously with a single tool. OCCT v17, released April 2026, provides a comprehensive combined test dashboard. Download from ocbase.com — the free version covers all standard testing needs.
What to look for: Any crash, system restart, driver reset, or error in either Prime95’s worker windows or FurMark’s display during the combined test.
What this test proves: If your system passes CPU-only, GPU-only, and combined CPU+GPU testing, it’s genuinely stable under the worst-case scenario any gaming or productivity workload can create. This is the standard that professionally built systems are validated against before shipping.
What “Stable” Actually Means
Stress test results fall into three categories. Understanding which category your result lands in tells you what to do next.
Passed cleanly: No errors, no crashes, temperatures within expected ranges, clock speeds stayed consistent throughout. The system is stable. You’re done.
Errors during CPU testing (Prime95): If errors appear during Small FFTs, the CPU or its clock/voltage configuration is unstable. For overclocked systems, reduce the overclock incrementally or add voltage. For stock systems, check that the cooler is mounted correctly, thermal paste is applied, and case airflow is adequate.
Errors during RAM testing (MemTest86): Disable XMP/EXPO and test again. If errors disappear at JEDEC speeds, the XMP/EXPO profile is unstable for your hardware try a lower speed profile or increase DRAM voltage slightly in BIOS. If errors persist at JEDEC defaults, the RAM may be faulty.
GPU crashes during FurMark: Check temperatures if the GPU isn’t overheating, an unstable GPU overclock or insufficient PSU headroom is the cause. For stock GPUs (no overclock applied), a single driver crash during FurMark that doesn’t repeat is often a fluke rather than genuine instability. If it repeats consistently, try Unigine Heaven as an alternative to confirm whether it’s FurMark-specific or a genuine hardware issue.
Passes individual tests but fails combined: This is a PSU issue. Under simultaneous maximum CPU and GPU load, your power supply is either undersized, aging, or has a marginal 12V rail. The fix is a higher-quality or higher-wattage PSU. This is why the combined test matters it’s the scenario that isolated CPU and GPU testing doesn’t validate.
SpecClear participates in affiliate programmes. When you purchase through links on this site we may earn a commission at no additional cost to you.