
Every modern game ships with a graphics settings menu that most people either leave on a preset or adjust randomly until frame rates feel acceptable. Neither approach is wrong, but neither one is informed. Some settings cost enormous GPU performance for barely visible improvements. Others are essentially free and look dramatically better at higher quality. Knowing which is which means you spend your GPU’s resources on things that actually matter.
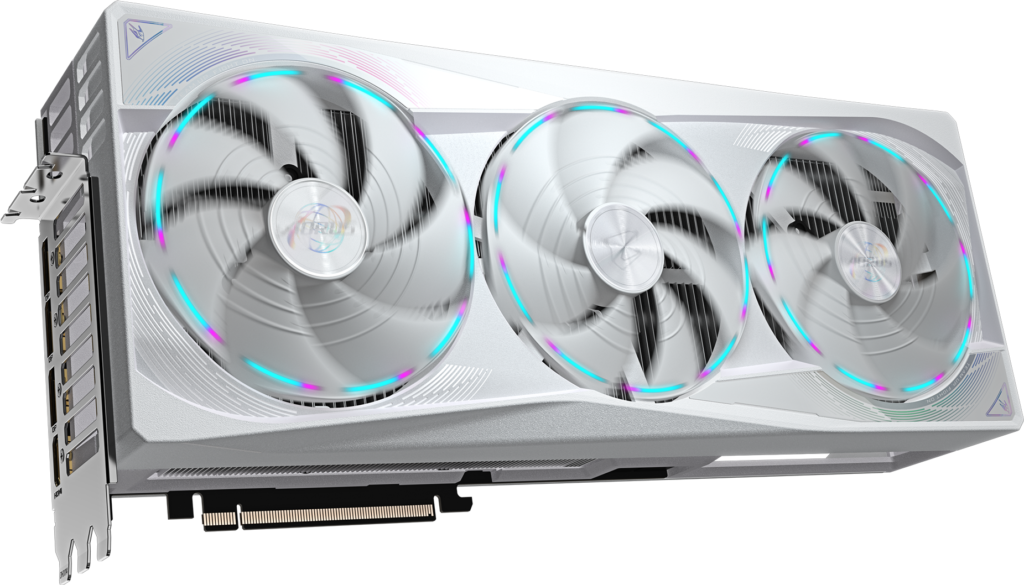
This guide covers every common graphics setting you’ll encounter across modern games in 2026. Each one gets a plain-language explanation of what it actually does, how much performance it typically costs, and whether to prioritise or deprioritise it when you need more frames. The examples use specific settings from real titles where the data is clearest, but the principles apply universally.
Before adjusting anything: use a monitoring overlay MSI Afterburner, the Nvidia App overlay, or AMD Adrenalin’s performance overlay to see your GPU usage, GPU temperature, and VRAM usage while gaming. If your GPU usage is below 90–95%, something other than the GPU is limiting your performance and adjusting graphics settings won’t help as much as you expect. The monitoring guide in this series covers how to set this up and interpret the readings.
In-Game Graphics Settings in 2026: Start With Upscaling
Before anything else on this list, set up your upscalling and in-game graphics settings explained . It’s the single highest-impact change available in modern PC gaming and it’s genuinely underused by most players.
What it is: Upscaling renders your game at a lower internal resolution and then reconstructs a higher-resolution image using AI or temporal algorithms before it reaches your display. The GPU does significantly less work per frame, which translates directly to higher frame rates.
What it actually does: At Quality preset the recommended starting point for most gamers the GPU renders at roughly 67% of your display’s native resolution. At 1440p, that means the GPU is processing approximately 960p worth of pixels and reconstructing a 1440p output. At 4K, the GPU processes 1440p and reconstructs 4K. The frame rate gain at Quality preset is typically 30–50%. The image quality loss compared to native rendering is, for most players at normal viewing distances, imperceptible in motion.
The three upscaling systems in 2026:
DLSS (Nvidia)
Available on all RTX 20, 30, 40, and 50 series cards. DLSS 4.5’s Transformer model is the best-performing upscaler available in 2026. Quality mode output is typically indistinguishable from native at 1440p and 4K in motion. DLSS also includes Multi Frame Generation on RTX 40 and 50 series — which generates up to 5 additional frames between each rendered frame. Enable DLSS Override in the Nvidia App to force the latest Transformer model onto older games that ship with earlier DLSS versions. The Nvidia App article in this series covers how to do that.
FSR (AMD)
Works on any GPU from any manufacturer, which makes it the most universally accessible upscaler. FSR 4 is machine-learning based on RX 9000 series hardware (RDNA 4). FSR 3.1 applies to older AMD cards and non-AMD hardware. Image quality at Quality preset is competitive with DLSS 4 on RDNA 4 hardware. On older hardware using FSR 3.1, image quality is good but slightly behind DLSS 4 at equivalent presets. Always prefer a game’s built-in FSR over the driver-level Radeon Super Resolution in-game FSR uses motion data for better reconstruction.
XeSS (Intel)
Intel’s upscaler available on all GPUs but performing best on Intel Arc hardware with dedicated XMX acceleration. Quality competitive with FSR 3 on non-Arc hardware, closer to DLSS 4 quality on Arc cards.
Which preset to use:
- Quality mode (67% of native resolution) for most 1440p and 4K gaming best image quality
- Balanced mode (58%) when you need more frames and can accept slightly softer output
- Performance mode (50%) for 4K gaming on mid-range cards at 4K, even the 50% internal render is still 1080p worth of pixels, which gives the AI model more to work with than Performance mode does at 1080p
- Ultra Performance mode (33%) 4K only, on high-end GPUs that are still struggling. At 1080p the input resolution becomes too low for clean reconstruction.
Frame Generation — the separate decision: Frame generation (DLSS Frame Generation, FSR Frame Generation, AMD AFMF) multiplies displayed frame rate by generating frames between rendered ones. It’s different from upscaling. Use frame generation when your base frame rate is already 50–60 FPS or higher frame generation makes smooth games smoother. Don’t use it to rescue genuinely unplayable frame rates it adds input latency and makes sluggish games feel worse, not better. Always enable your upscaling first, then add frame generation if you still need more frames.
Texture Quality: Run This as High as Your VRAM Allows
What it is: The resolution of the surface detail applied to every object in the game walls, characters, ground, vehicles, everything.
What it actually does: Higher texture quality means sharper, more detailed surfaces up close. Lower quality means objects look blurry or plasticky when viewed directly. This is the setting most players notice most immediately when it’s wrong.
The key insight: Texture quality primarily consumes VRAM rather than GPU compute power. A GPU with sufficient VRAM can run Ultra textures at almost no frame rate cost compared to Medium textures. The GPU isn’t working significantly harder it’s just storing and accessing more detailed images.
Performance cost: Near zero if your VRAM can hold the textures. Significant if VRAM overflows when a game’s texture budget exceeds your card’s memory, the GPU has to stream textures from system RAM over the PCIe bus, which causes the characteristic texture pop-in and stuttering that gamers associate with VRAM pressure.
How to set it: Raise texture quality as high as possible while monitoring VRAM usage in your overlay. If VRAM usage stays below 85–90% at your maximum with the game fully loaded into a demanding scene, Ultra textures are free. If VRAM climbs above 95%, drop one preset and check again. This is more important than almost any other setting running Ultra textures on a card with sufficient VRAM is one of the highest visual quality gains available at minimal performance cost.
Important 2026 note: Many mid-range 8GB cards are now hitting VRAM limits at Ultra textures in demanding titles at 1440p. God of War benchmarks showed 11.5GB in use at maximum settings. If you own an 8GB card and are gaming at 1440p, High textures are often the safe ceiling rather than Ultra.
Shadow Quality: The Most Expensive Visual Setting
What it is: Controls the resolution, distance, and complexity of shadows cast by objects in the game world.
What it actually does: Shadow rendering is computationally expensive because the GPU has to process shadow maps essentially separate depth calculations for every significant light source in the scene, at the shadow resolution specified by the setting. Ultra shadows often involve multiple high-resolution cascades covering near, mid, and far distances simultaneously.
Performance cost: The difference between Ultra and Low shadows is approximately 15–20% frame rate in most tested titles. High shadows versus Ultra is typically 5–8%. The visual difference between High and Ultra is subtle most of the improvement in Ultra over High is in very distant shadow quality that most players don’t focus on.
How to set it: High is the sweet spot for almost every gaming scenario, The performance cost of Ultra over High rarely justifies the visual improvement unless you’re running a high-end GPU with frame rate headroom to spare. Low and Medium shadows look obviously worse in indoor scenes with complex lighting High is the floor for image quality you’ll be satisfied with.
Global Illumination and Lighting Quality
What it is: Global Illumination (GI) simulates how light bounces between surfaces in a scene indirect light from a lit floor reflecting onto a nearby wall, light entering a room from outside and scattering across surfaces, colour bleeding between objects.
What it actually does: Real-time GI is the setting most responsible for whether a game looks believably lit or feels like a game. Baked GI (pre-computed, used in older titles) looks correct only in static conditions and is free. Real-time GI using Unreal Engine 5’s Lumen system or similar technology recalculates lighting dynamically and appears in most major 2024–2026 releases.
Performance cost: Real-time GI is one of the most expensive settings in a modern game. In Unreal Engine 5 titles, disabling Lumen or dropping it from High to Low can recover 15–25% frame rate. In games using hardware-accelerated RT-based GI (like Cyberpunk 2077’s Psycho preset), this single setting can account for 30–40% of frame time.
How to set it: Enable real-time GI when your frame rate allows. When you need performance, this is one of the first places to look after shadows the quality improvement is high, but so is the recovery from disabling it. Medium GI in most Lumen-based games still looks significantly better than no dynamic GI.
Anti-Aliasing: Understanding What to Use in 2026
What it is: A technique that smooths jagged edges on objects and surfaces the “stairstepping” that appears on diagonal lines at lower resolutions.
In 2026, if you’re using upscaling, you don’t need to configure anti-aliasing separately. DLSS, FSR, and XeSS all include temporal anti-aliasing as part of their reconstruction process. Setting in-game anti-aliasing to “Off” or “TAA” when upscaling is active is the correct approach letting the upscaler handle both tasks simultaneously.
If you’re not using upscaling, here’s what each option means:
MSAA (Multisample Anti-Aliasing): Samples multiple points within each pixel to determine colour. High quality but expensive 4x MSAA at 1440p significantly impacts frame rate and doesn’t handle transparency effects well. Rarely worth enabling over TAA in modern games.
TAA (Temporal Anti-Aliasing): Uses information from previous frames alongside the current frame to smooth edges over time. Low performance cost, effective at eliminating jaggies, but can introduce slight blurring on fine moving details and ghosting on fast-moving objects. This is the most common default in modern games.
SMAA (Subpixel Morphological Anti-Aliasing): A post-processing approach that analyses edge patterns. Sharper than TAA with less ghosting, but doesn’t handle very fine geometry as smoothly. Good alternative to TAA if a game’s TAA implementation causes noticeable blurring.
FXAA (Fast Approximate Anti-Aliasing): Very low cost, very low quality. Acceptable for older games where TAA wasn’t an option. In modern titles, avoid FXAA if TAA or SMAA is available.
Performance cost: DLSS/FSR with AA off: essentially free. TAA: 2–5%. SMAA: 3–6%. MSAA 4x: 15–25%.
Ray Tracing: When It’s Worth It and When It Isn’t
What it is: A rendering technique that simulates how light actually behaves tracing the path of light rays as they bounce between surfaces, generate shadows, and create reflections.
What it actually does: Traditional rasterisation (how games have always rendered) approximates lighting using mathematical shortcuts. Ray tracing calculates it physically. The result is reflections that accurately show what’s actually in the scene, shadows with correct softness based on light source size, and lighting that bounces realistically between surfaces. The visual difference is most apparent in indoor scenes, wet surfaces, glass, metal, and anywhere lighting is complex.
The cost reality: Ray tracing remains expensive in 2026. The pattern across most titles:
- RT Reflections: 10–20% frame rate reduction. Best visual-to-cost ratio of any RT effect.
- RT Shadows: 10–15% reduction. Softer, more accurate shadows most noticeable at midday outdoor scenes.
- RT Ambient Occlusion: 5–10% reduction. Subtle contact shadows in crevices and corners.
- RT Global Illumination: 25–40% reduction. The most impactful and most expensive RT effect.
- Full Path Tracing: 50–70%+ reduction. Every lighting calculation rendered physically. Requires upscaling and frame generation to be playable on most hardware.
The honest assessment: At the RTX 4070, RTX 5070, or RX 9070 tier and above, RT Reflections and RT Shadows at High or Medium quality with DLSS or FSR Quality mode active is a reasonable combination that improves visual fidelity without completely sacrificing frame rate. Below that tier, the performance cost of most RT effects eats into frame rate headroom that you need for smooth gameplay. According to real-world usage data from a large PC hardware retailer, approximately 78% of RTX 4060 owners disable ray tracing within 60 days of purchase. The percentage drops to around 31% for RTX 4070 and above owners.
How to use ray tracing effectively:
- Enable upscaling (Quality mode) first
- Enable RT effects starting with Reflections, which gives the best visual improvement per frame rate cost
- Add RT Shadows if frame rate allows
- Leave RT Global Illumination off unless you have significant headroom
- Never enable path tracing without frame generation — the raw FPS will be too low for comfortable play on any card below an RTX 5090
Volumetric Lighting and Fog
What it is: Volumetric lighting makes light beams visible in air sunbeams through windows, flashlight beams in dark rooms, headlights in rain. Volumetric fog gives atmospheric haze genuine depth and light response.
What it actually does: Without volumetric effects, light has no visible presence in the air it simply hits surfaces and stops. With volumetric lighting, the space between a light source and its destination has visible light scatter. The effect is one of the most cinematic in modern games.
Performance cost: Medium to High. Volumetric fog at Ultra can cost 8–15% frame rate depending on implementation. The effect is significantly more noticeable in indoor or overcast environments than in bright outdoor scenes.
How to set it: Medium quality provides most of the visual benefit for less than half the performance cost of Ultra in most implementations. This is a setting worth dropping from Ultra to High or Medium when you need frames — the visual difference between High and Ultra volumetrics is subtle compared to the performance savings.
Ambient Occlusion
What it is: A technique that darkens areas where surfaces are close together its why the crease where a wall meets the floor, the space under a ledge, the area where two objects sit against each other.
What it actually does: Without ambient occlusion, objects appear to float above surfaces because there’s no contact shadow indicating they’re actually resting there. AO restores the visual cue that separate surfaces are physically close. It’s one of the settings that contributes most to a scene feeling grounded and real rather than artificial.
Performance cost: Low to Medium. SSAO (Screen Space Ambient Occlusion) costs 3–8%. HBAO and RTAO (Ray Traced AO) cost more. The difference between screen-space AO and ray-traced AO is subtle in most scenes — screen-space versions miss AO on geometry outside the current camera view, but players rarely notice this in motion.
How to set it: Leave it on at High or HBAO quality, The performance cost is low enough that this isn’t a meaningful place to save frames, and the visual quality impact of disabling it entirely is obvious.
Anisotropic Filtering
What it is: A technique that improves texture sharpness on surfaces viewed at angles — ground, roads, walls extending into the distance.
What it actually does: Without anisotropic filtering, textures on surfaces viewed at oblique angles appear blurry and washed out the further they extend from the camera. With 16x AF (the maximum), those surfaces remain sharp at any angle. The difference is most visible when looking along the ground or down a corridor.
Performance cost: Essentially zero on modern hardware. 16x anisotropic filtering costs less than 1% on any GPU from the last five years.
How to set it: Always set to 16x this is the only setting in this entire guide where there’s no trade-off to consider a maximum anisotropic filtering is always the right answer.
Motion Blur
What it is: A post-processing effect that blurs fast-moving objects or the camera during rotation to simulate the motion blur effect produced by real cameras.
What it actually does: Film and photography produce motion blur naturally because the camera’s sensor is exposed over time. Games render discrete frames. Motion blur is an approximation of that temporal smearing added in post-processing to make game motion feel more cinematic.
How to set it: Personal preference. Some players find motion blur improves the sense of speed and fluidity is particularly in racing games and cinematic action titles. Others find it makes games harder to read during combat and prefer the sharp clarity of motion-blur-off. At competitive frame rates (100+fps), motion blur is usually counterproductive — you don’t need artificial blur when your monitor is refreshing fast enough to show real motion naturally. At lower frame rates in single-player games, medium motion blur can make the experience feel smoother than it technically is.
Performance cost: Low. Motion blur is a post-processing pass and typically costs 2–5%.
Depth of Field
What it is: An effect that blurs out-of-focus elements of the scene to simulate the focal characteristics of a camera lens.
What it actually does: Real camera lenses have a finite depth of focus objects at the focal distance are sharp, objects closer or further are progressively blurred. Games add depth of field in post-processing to give scenes a more cinematic quality and draw the player’s attention to specific elements.
How to set it: Preference, with a practical note of in games with over-the-shoulder or first-person cameras, heavy depth of field can blur important environmental information during exploration. Many players disable it entirely in combat-focused games. In story-driven cinematic games it contributes meaningfully to atmosphere. Enable it when the game’s presentation benefits from it, disable it when it gets in the way of reading the environment clearly.
Performance cost: Low to Medium. 3–8% depending on implementation.
The Quick Priority Framework
When you need more frames, adjust settings in this order you should be starting with, the settings that give back the most performance per visual quality sacrifice:
- Enable upscaling first — biggest frame rate recovery for smallest visual cost
- Drop shadow quality from Ultra to High — typically 5–8% recovery with minimal visual change
- Disable or reduce RT Global Illumination — 15–25% recovery in titles using it
- Drop volumetric effects from Ultra to High — 5–8% recovery
- Reduce RT Reflections or disable RT entirely — 10–20% recovery
- Only touch texture quality last — and only if VRAM is actually overflowing
Never sacrifice:
- Anisotropic filtering — always 16x, effectively free
- Ambient occlusion — too visually important for too little cost
- Texture quality — drop it only when VRAM forces you to
SpecClear participates in affiliate programmes. When you purchase through links on this site we may earn a commission at no additional cost to you.
Continue Reading: The Full Gaming Optimisation Series
This article is part of SpecClear’s complete PC gaming optimisation series. Work through all six guides to get the most out of your hardware.