
RAM installation is the quickest step in any PC build it will take under two minutes once you know what you’re doing. It’s also the step most likely to cause a failed first boot if one critical detail is missed: which slots to use, this guide covers physical installation, dual-channel slot selection, and the one BIOS setting that most builders forget to enable and immediately costs them 15–30% gaming performance.
What dual-channel memory actually means
Modern motherboards have either two or four RAM slots, when you install two matching RAM sticks and place them in the correct slots, the memory controller operates in dual-channel mode along with two 64-bit data channels working simultaneously for an effective 128-bit data path. This roughly doubles the memory bandwidth available to the CPU compared to single-channel operation.
The performance difference between single-channel and dual-channel RAM is most visible in gaming. On AMD Ryzen processors specifically, where the CPU’s Infinity Fabric interconnect is tightly coupled to memory bandwidth, single-channel operation reduces gaming performance by 15–30% compared to dual-channel in CPU-sensitive titles. This is the free performance gain that’s sitting unclaimed in any build where RAM is installed in the wrong slots.
Two sticks in the correct slots run in dual-channel. One stick, or two sticks in the wrong slots, runs in single-channel. This matters more than which brand of RAM you buy.
Which slots to use: the most important installation decision
Modern motherboards have either two or four RAM slots. When you install two matching RAM sticks and place them in the correct slots, the memory controller operates in dual-channel mode as well with two 64-bit data channels working simultaneously for an effective 128-bit data path. This roughly doubles the memory bandwidth available to the CPU compared to single-channel operation.
The performance difference between single-channel and dual-channel RAM is most visible in gaming. On AMD Ryzen processors specifically, where the CPU’s Infinity Fabric interconnect is tightly coupled to memory bandwidth, single-channel operation reduces gaming performance by 15–30% compared to dual-channel in CPU-sensitive titles. This is the free performance gain that’s sitting unclaimed in any build where RAM is installed in the wrong slots. If you still need a kit, see our best DDR5 RAM for gaming picks.
Two sticks in the correct slots run in dual-channel, one stick, or two sticks in the wrong slots, runs in single-channel. This matters more than which brand of RAM you buy.
Which slots to use: the most important installation decision
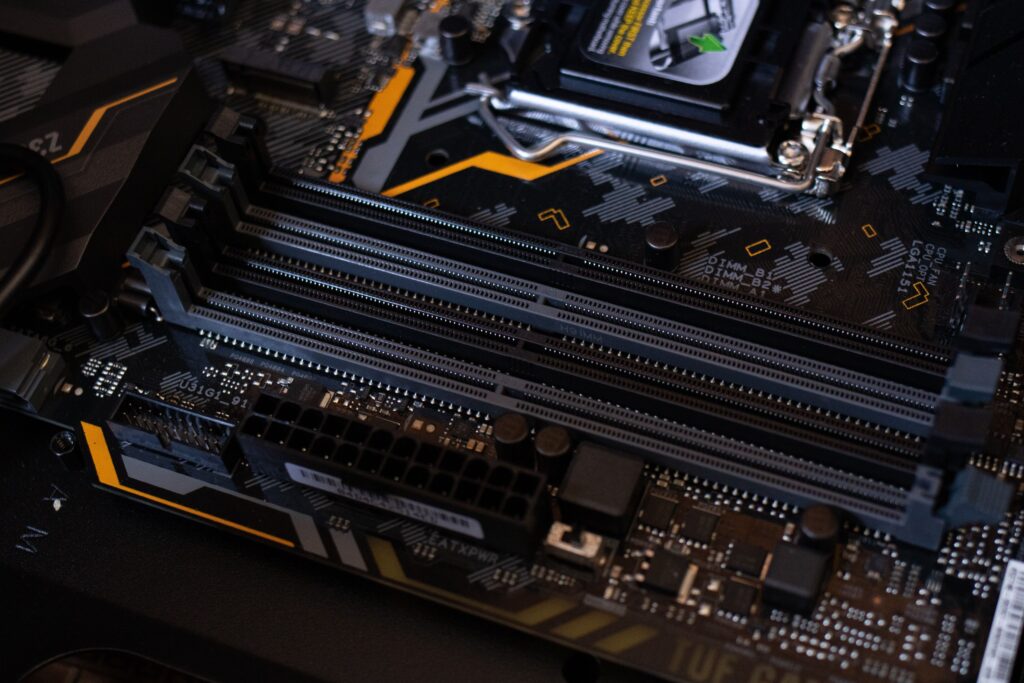
Most builders assume RAM goes in slots 1 and 2 are the two slots closest to the CPU. This is wrong on virtually every modern motherboard. Installing in slots 1 and 2 typically results in single-channel operation.
The correct slots are A2 and B2 is the second slot in each channel, which on most four-slot motherboards means slots 2 and 4 counting from the CPU side. These are typically the same colour on boards that use colour coding in two black slots, or two grey slots, separated by one slot each.
The reason for this non-obvious slot assignment: on modern high-speed DDR5 platforms, the electrical trace routing between the CPU memory controller and the DIMM slots is optimised for A2/B2 population. Using A1/B1 (closest to the CPU) introduces signal integrity issues at high frequencies. Motherboard manufacturers universally recommend A2/B2 for two-stick configurations and explicitly state this in their manuals.
Check your specific motherboard manual before installing, the recommended slot configuration is printed clearly. Usually on page 1 or 2, often with a diagram showing which slots to populate for optimal performance. If you don’t have the physical manual, download it from the manufacturer’s website by searching your motherboard model number.
Physical installation: step by step
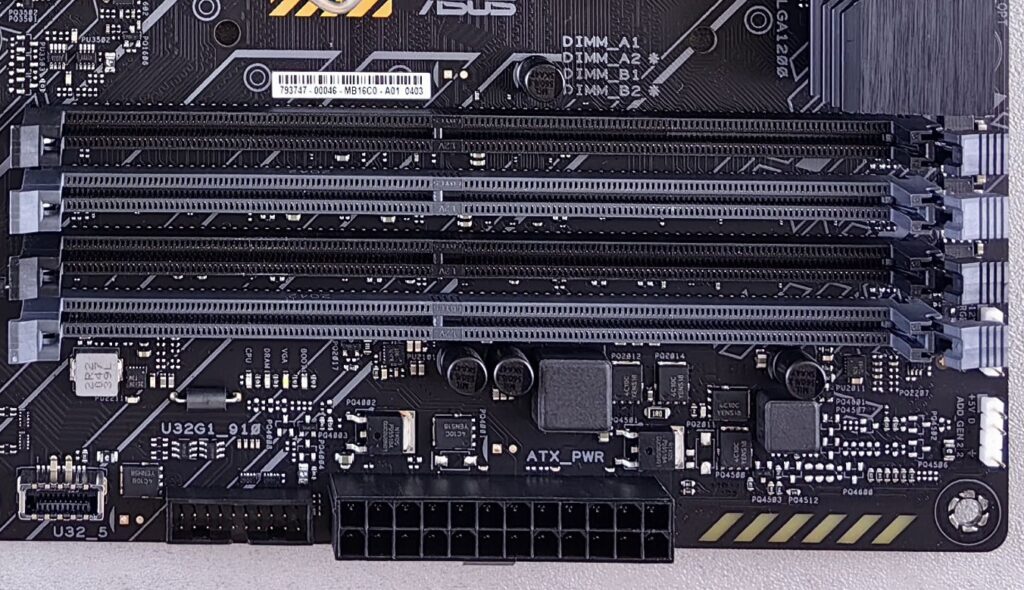
Motherboard flat on the desk outside the case, RAM slots are the long vertical slots to the right of the CPU socket.
Step 1: Open the retention clips
Each RAM slot has one or two plastic retention clips a certain small levers at the end of the slot, on four-slot boards these are typically at both ends. Push the clips outward to open them. You’ll hear or feel a click as they open, don’t force them, they open with moderate finger pressure. Some boards have clips on both ends; others have a clip on one end only with the other end fixed. Check before forcing.
Step 2: Orient the RAM stick correctly
Look at the bottom edge of the RAM stick you will see the gold contacts, there’s a notch in the contacts that’s offset from centre. The RAM slot has a corresponding ridge. The notch and ridge must align. DDR5, DDR4, DDR3, and DDR2 all use different notch positions, making it physically impossible to install the wrong generation of RAM in a slot well this is because it won’t fit Best AM5 Motherboard for Gaming 2026
Hold the stick above the slot with the notch aligned to the ridge, the label on the stick faces upward on most installations.
Step 3: Seat the RAM
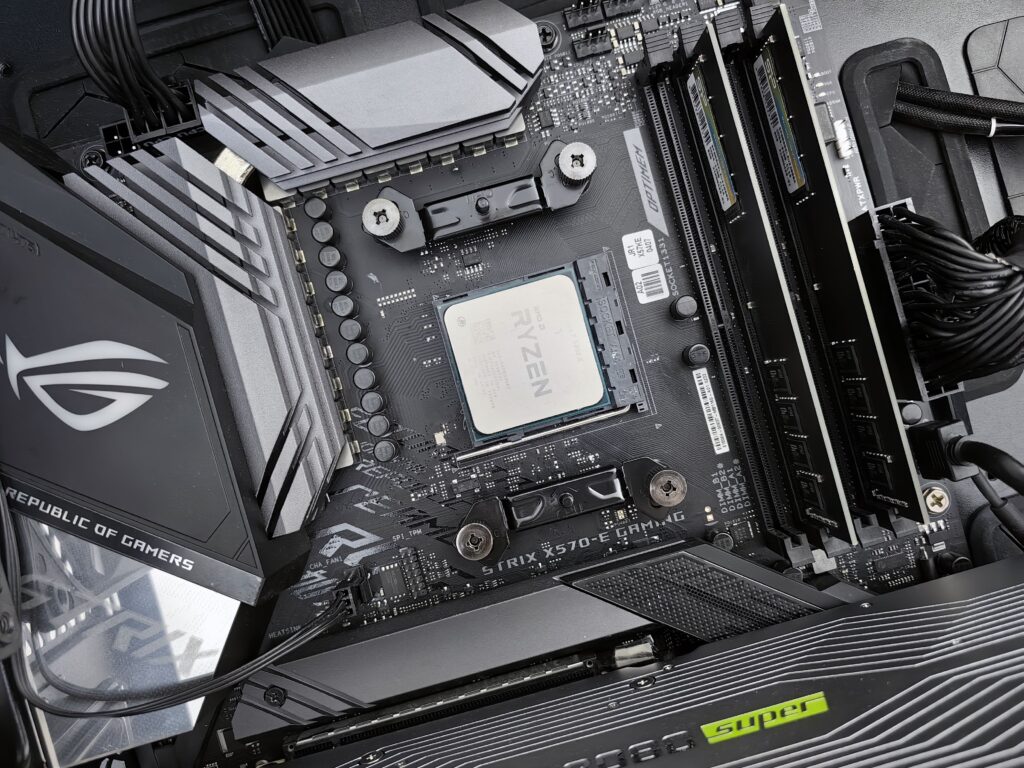
Apply firm, even downward pressure with two thumbs plus one at each end of the stick. Push straight down don’t rock or twist, the stick requires more force than most beginners expect this is normal. Push firmly and evenly until you hear and feel both retention clips click into the locked position simultaneously. Both ends must seat fully. A partially seated stick produces no boot or memory errors.
If one clip clicked but not the other, apply additional pressure to the unclipped end. The stick won’t damage if you press firmly how ever it’s designed for this installation force.
Step 4: Verify both sticks are seated
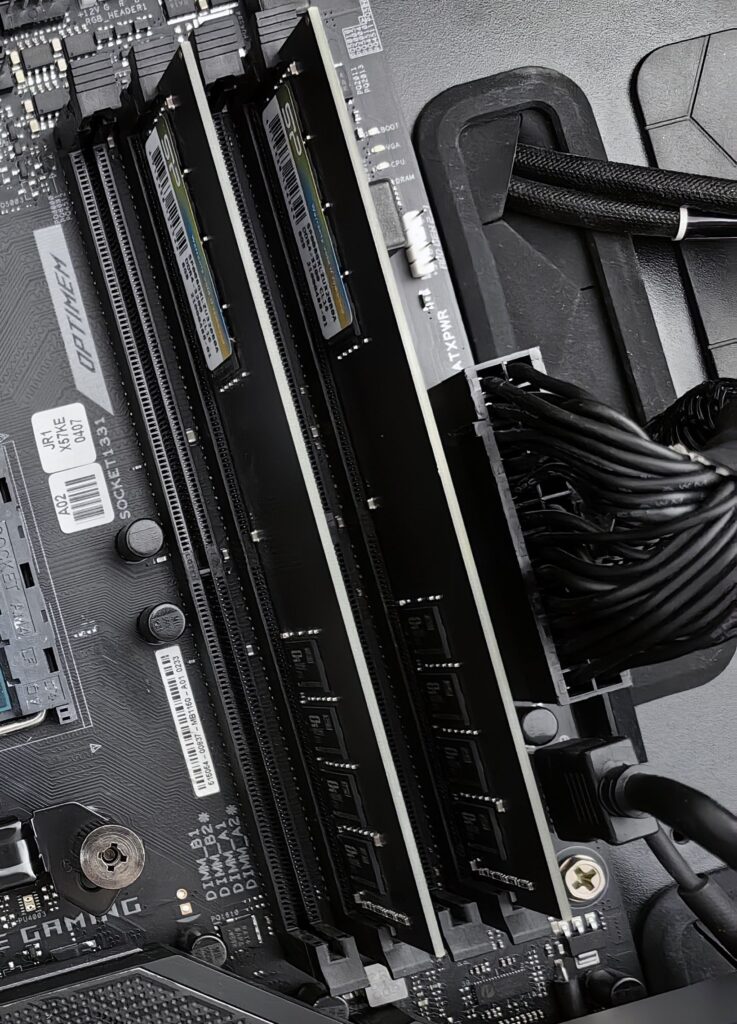
After installing both sticks, look at the retention clips from the side. Both should be fully vertical and locked, not angled outward. Visually confirm both sticks sit at the same height in their slots with no gap between the stick and the slot housing.
First boot: what to expect with new RAM
Boot the system. Many motherboards display a message on first boot with new RAM or after a CMOS reset: “CMOS settings changed press F1 to enter setup or F2 to continue.” Either option is fine, if you see this, it’s normal.
Check that the correct amount of RAM is recognised, in Windows: Start → System → About → Installed RAM. If you installed 32GB and Windows shows 32GB, the sticks are seated correctly. If it shows 16GB or 8GB, one stick isn’t seated first power down, reseat the stick showing reduced capacity, and reboot.
If the system doesn’t boot at all still does not show display, fans spin but no POST but a RAM stick is almost always the cause. Power down, reseat both sticks firmly, and try again. This resolves the majority of no-POST issues on new builds.
Enabling XMP or EXPO: the step most builders skip
Your RAM is currently running slower than it should be. This applies to almost every build where XMP or EXPO hasn’t been manually enabled.
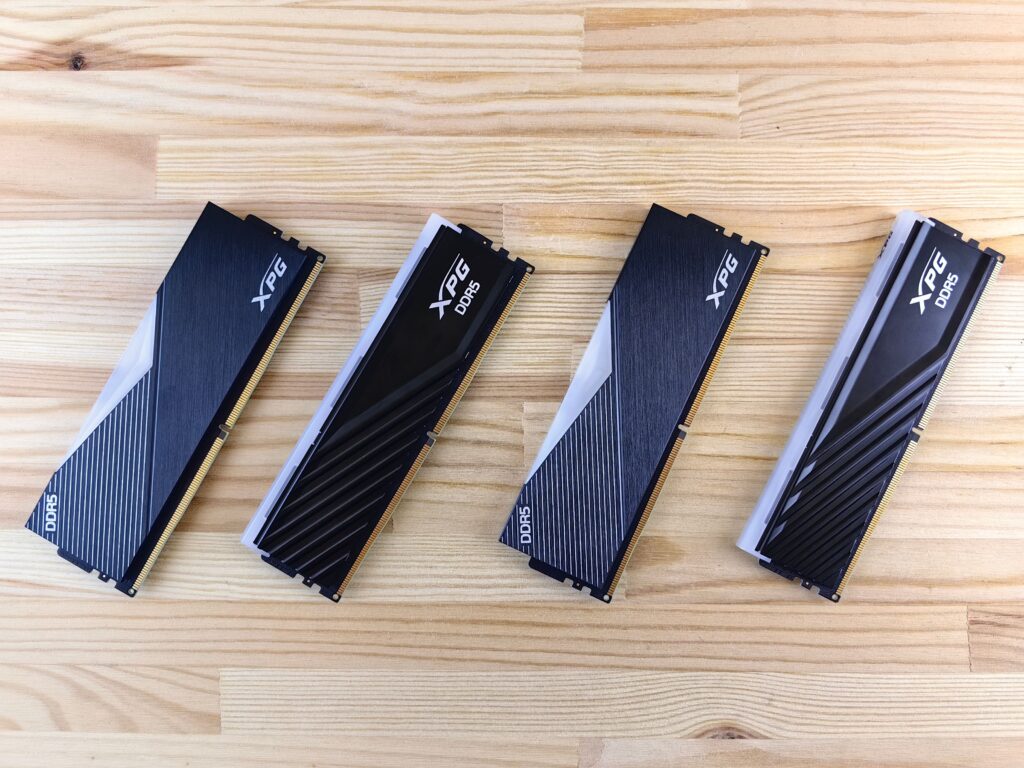
DDR5 kits ship with JEDEC default speeds encoded as a fallback. A DDR5-6000 CL30 kit that cost $150+ will boot at DDR5-4800 by default when the JEDEC standard speed when until you enable the rated profile in BIOS. This is not a defect. It’s intentional compatibility behaviour. The kit runs at a guaranteed-stable speed across all platforms by default, and you opt into the higher rated speed manually.
How to enable XMP on Intel platforms:
Enter BIOS on first boot by pressing Delete, F2, or the key shown on the POST screen. Navigate to the memory or AI Tweaker section the location varies by motherboard brand. Find XMP Profile or Memory Profile settings. Select XMP Profile 1 this applies your RAM kit’s rated speed and timings. Save and exit. The system restarts once and boots at the correct speed.
How to enable EXPO on AMD AM5:
Same process, different name in BIOS find EXPO settings. AMD’s equivalent of XMP select EXPO Profile 1 Save and exit.
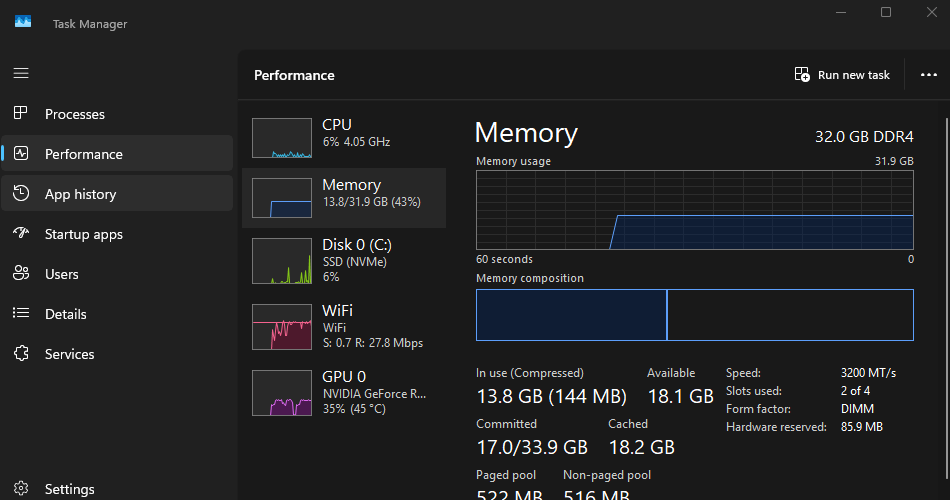
After enabling XMP or EXPO, verify the change worked. In Windows press Ctrl + Shift + Esc to open Task Manager → Performance → Memory. The Speed field shows current RAM frequency. A DDR5-6000 kit shows 3000 MHz here while half the rated speed, because Task Manager displays the base clock rather than the effective double-data-rate speed. 3000 MHz in Task Manager = DDR5-6000. If it still shows 2400 MHz (DDR5-4800), the EXPO/XMP profile didn’t apply start over re-enter BIOS and verify the setting saved correctly.
Alternatively, download CPU-Z its free, trusted, widely used, open it, click the Memory tab. The DRAM Frequency field shows the base clock. Timing columns show the CL value. Compare both against your kit’s specification sticker. If they match, you’re running at rated speed. To confirm the memory is stable at that speed, run the tests in our guide on how to stress test your PC.
What if your RAM runs at a lower speed than rated after enabling XMP?
Some DDR5 kits list speeds the motherboard’s memory controller can’t fully support at tight timings. A DDR5-7200 kit in an AM5 board may fall back to DDR5-6000 automatically but this is the board’s stability management, not a failed installation. Check the motherboard’s Qualified Vendor List (QVL) for your RAM kit model. If your specific kit is on the QVL for your board, the rated speed should be achievable. If it’s not on the QVL, the board will run it at a speed it can guarantee rather than the kit’s rated maximum.
For gaming performance, DDR5-6000 CL30 is the sweet spot on AM5. Running DDR5-7200 or DDR5-8000 provides minimal additional gaming benefit on Ryzen while the Infinity Fabric scales best to DDR5-6000 and the cache architecture of X3D chips makes them nearly insensitive to RAM speed above that point.
Installing four sticks
Four-slot boards support four sticks for 64GB or 128GB configurations. Populate A1, A2, B1, B2 for all four slots plus one for quad-channel-equivalent bandwidth on dual-channel platforms. On current AMD and Intel consumer desktop platforms, four sticks run in dual-channel regardless of slot count, but filling all four slots maximises the density available per channel. Note that four sticks of DDR5 at high speeds can be harder to stabilise than two on the other hand if you experience boot issues with four sticks that didn’t occur with two, the EXPO or XMP profile may need a manual frequency reduction of one step to achieve stable operation.