
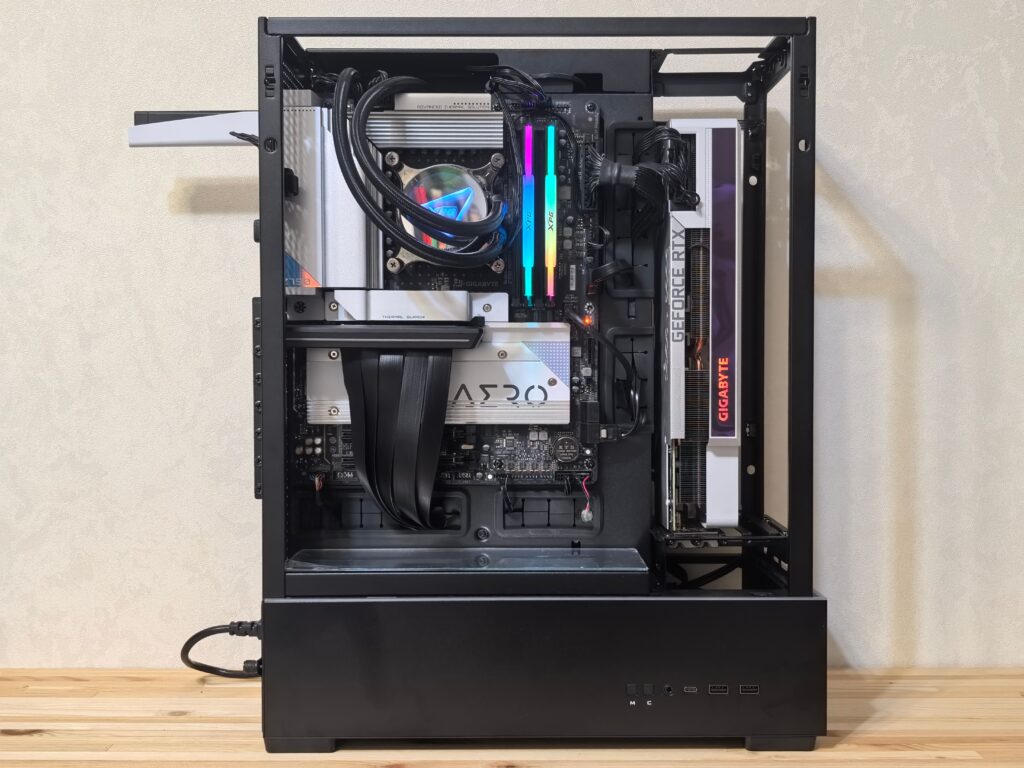
Most people who look at a custom water-cooled PC assume it’s about looks. The glass tube running bright blue coolant past a glowing pump, RGB lighting reflecting off a polished nickel block. That stuff exists, and some builders love it.
Custom water cooling isn’t primarily about any of that though. It’s about thermal headroom: running an RTX 5090 at sustained load without thermal throttling killing your performance. It’s about building a near-silent PC that keeps temperatures consistent during four-hour gaming sessions. The aesthetic is a side effect of the engineering.
This guide covers every component in a custom loop, what it does, what you can skip, what you can’t, and how to build one from scratch without flooding your desk. It’s long because the subject is genuinely complex. Read all of it before you buy anything.
Should You Even Bother?
Honest answer first: most people shouldn’t build a custom loop.
If you’re running a Ryzen 7 9800X3D and an RTX 5060 Ti, a 360mm AIO on the CPU and the GPU’s stock cooler handles everything without complaint. Temperatures stay manageable, noise is acceptable, and you’ve spent $100-$150 instead of $500-$800. Custom water cooling at that hardware tier is money you’d spend better on a better GPU or more RAM.
Custom loops make sense when the hardware demands it. The RTX 5090 runs at up to 600W under sustained load. Premium AIO coolers struggle to keep that chip from throttling during extended gaming sessions. The 9950X3D under sustained all-core workloads hits temperatures that air cooling handles poorly. If you’re running flagship-tier hardware and either need lower temperatures, lower noise, or both, a custom loop is the correct solution. It’ll cost more, take longer to build, and need maintenance. Those are real trade-offs, not minor inconveniences.
Know why you’re building one before you start. “It looks cool” is a legitimate reason if you’re honest about it, but build your budget around aesthetics being the goal, not performance being the excuse.
The Components: What Each One Does and Why It Matters
The Water Block: Where Heat Leaves Your Components

The water block sits directly on your CPU or GPU, replacing the stock cooler. It’s a precision-machined block of copper or nickel-plated copper with internal channels cut to create turbulent coolant flow across the surface. Turbulent flow transfers heat more efficiently than laminar flow, the channels are deliberately designed to disrupt smooth flow and maximise contact between coolant and the heat-transferring surface.How to Apply Thermal Paste to Your CPU
CPU blocks fit specific sockets. An AM5 block is not the same as an LGA1851 block, so buy for your socket. EK, Alphacool, Corsair, and Thermaltake all make quality CPU blocks in the $70-$158 range. The performance difference between a $75 EK-Quantum Velocity² and a $120 premium block from the same manufacturer is real but small, typically 2-4°C under load. Not worth doubling the price for.
GPU blocks are where things get expensive and complicated. A full-coverage GPU block sits over the entire PCB, cooling the GPU die, VRAM chips, and VRM components simultaneously. This is the correct block to buy if you’re water-cooling a GPU. Partial blocks that only cool the die exist and cost less, skip them. The VRM and VRAM on high-TDP cards like the RTX 5090 generate substantial heat that partial blocks leave unaddressed, and VRM temperatures directly affect sustained boost clocks.
GPU blocks are board-specific. An RTX 5090 block from EK fits the reference PCB design, but custom AIB cards from Asus, Gigabyte, and MSI often use different PCB layouts. Check compatibility before buying. EK’s compatibility checker at ekwb.com is the most accurate database. Getting this wrong means a $200+ block that won’t fit.
Full-coverage GPU blocks run $150-$250 for current-gen cards. Add a backplate, a matching metal plate that covers the rear of the PCB, for $40-$80. Backplates are optional but protect the PCB during handling and look significantly better through a glass panel.
Can you skip GPU water cooling? Yes: a CPU-only loop is a legitimate build, especially if your GPU isn’t a flagship card. The pump, radiator, reservoir, and tubing all still cool the CPU effectively. You add the GPU block later if you want to expand the loop. Many builders start CPU-only.
The Pump: The Heart of the Loop
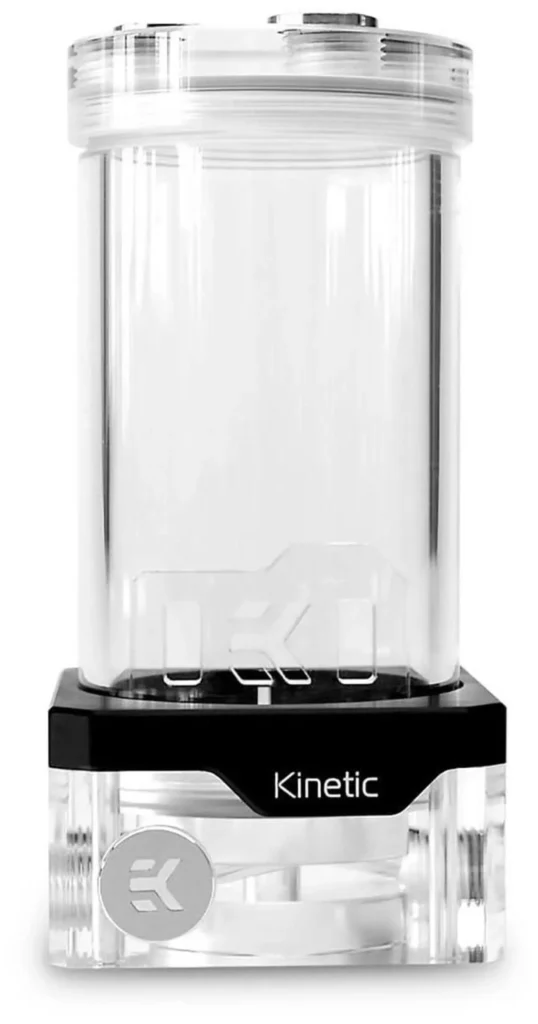
The pump circulates coolant around the loop. No pump means no flow, and no flow means no cooling.
DDC and D5 are the two pump types you’ll encounter. DDC pumps are smaller, produce higher pressure (useful in tight loops with lots of fittings), and are louder. D5 pumps are larger, move more volume at lower noise levels, and are the standard choice for most builds. If you’re building in a large mid-tower with multiple radiators, use a D5. DDC makes sense in small form factor builds where space dictates it.EK-Quantum Kinetic D5 pump reservoir ($281)
Pumps typically run at 3-pin PWM headers on the motherboard, letting you control speed. Running a D5 at 60-70% speed produces the same thermal performance as 100% while significantly reducing noise, the acoustic difference is substantial. Run your pump at full speed and it’s audible. Run it at 60% and it disappears into background noise.
Don’t cheap out on the pump. A pump failure drains coolant flow from the loop while temperatures spike toward dangerous levels. EKWB, Aquacomputer, and Alphacool make pumps with failure rates low enough that the r/watercooling community consistently recommends them. Budget $60-$100 for a quality D5 pump.
The Reservoir: Coolant Storage and Air Removal
The reservoir holds excess coolant, acts as the fill point for the loop, and, most importantly, gives air bubbles somewhere to escape to rather than circulating through the loop. Air in the loop creates hot spots, noise, and pump cavitation. The reservoir solves all three problems by giving air a dead end to collect in.
Reservoirs come in tube form (cylindrical, mounts on the pump or to the case) and D5 top form (sits directly on the D5 pump as a combined unit). The pump-top combination is the most common configuration in 2026 because it reduces the number of fittings needed and keeps the reservoir close to the pump inlet. EK, Barrow, and XSPC all make quality pump-top combinations for $80-$278

Reservoir size affects how long bleeding takes and how much coolant capacity you have. A 200mm tube reservoir is adequate for most single-CPU loop configurations. Double-radiator setups benefit from larger reservoirs, 300mm or above.
Can you skip the reservoir? Technically yes, some builders run reservoir-free loops using a t-line (a capped tube at the highest point of the loop) as a fill point and air collection point. T-lines work but make filling and bleeding significantly harder. First builds should always include a proper reservoir.
The Radiator: Where Heat Leaves the Loop

The radiator is where the coolant dumps the heat it collected from your components. Hot coolant flows through thin internal channels, fans mounted to the radiator’s exterior move air across the fins between those channels, and heat transfers from coolant to air to outside your case. EK CoolStream SE 360mm ($109)Air Cooler vs AIO CPU Cooler 2026
Radiator sizing is the most important decision in planning a custom loop. Get this wrong and you’re building a system that runs hotter than a good AIO. The rule of thumb: 120mm of radiator surface per 100-150W of TDP you’re cooling. Practically speaking:
CPU-only loop on a 65W chip (Ryzen 5 9600X): a 240mm radiator is adequate. A 360mm gives you headroom and lets fans run slower and quieter.
CPU-only loop on a high-TDP chip (Core Ultra 9, 9950X3D): 360mm minimum. 420mm preferred.
CPU and GPU loop on a flagship-tier system (9950X3D plus RTX 5090 at a combined 750-800W TDP): two 360mm radiators. One isn’t enough. Running insufficient radiator surface means pushing fans harder to compensate, which eliminates the acoustic advantage of custom cooling entirely.
Radiators come in different thicknesses, typically 25mm, 30mm, and 45-60mm for thick “performance” variants. Thicker radiators hold more fluid volume and have more fin surface area, but require high-static-pressure fans to push air through the denser fin stack. A 45mm thick radiator with the wrong fans performs worse than a 30mm radiator with the right ones. Noctua NF-A12x25 and Corsair ML120 Elite are the fan recommendations for radiator duty, high static pressure, low noise, consistent airflow across the fin stack.Noctua NF-A12x25 fan

EK’s CoolStream and Alphacool’s NexXxoS series are the consistent radiator recommendations across the enthusiast community. Cheap radiators from unknown brands often have inconsistent internal channel quality that affects flow resistance and thermal performance. Budget $60-$100 per 360mm radiator.Noctua NT-CP1 Carbon Nanotube Thermal Pad
Tubing: What Connects Everything
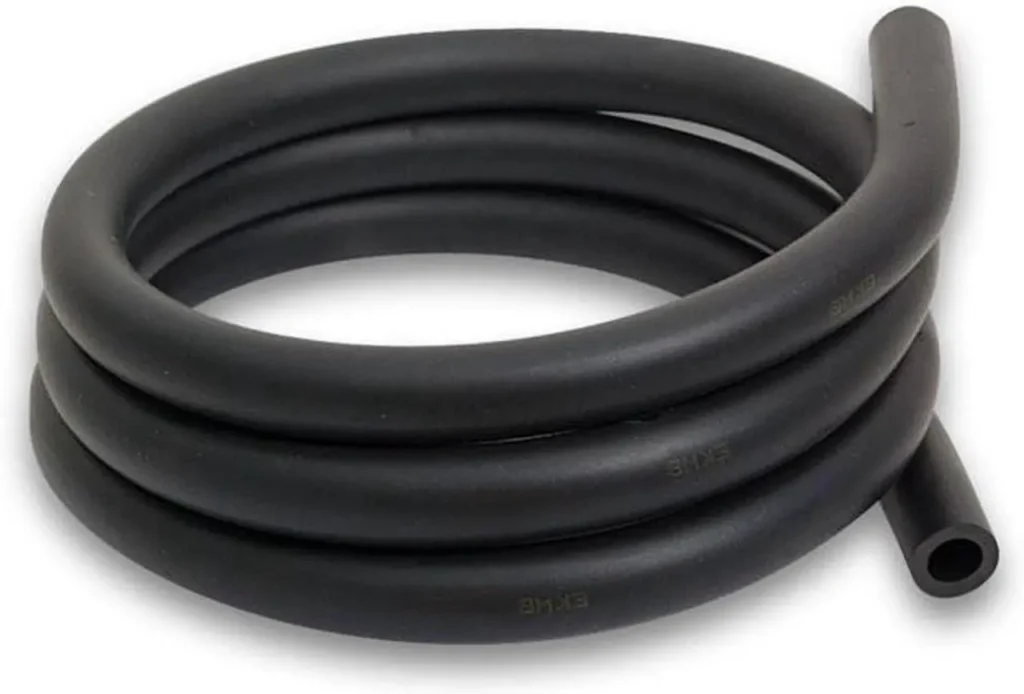
Two types. Soft tubing and hard tubing. The choice is almost entirely aesthetic and practical, not thermal.
Soft tubing is flexible rubber or PVC in various diameters, 13/10mm (inner/outer) and 16/12mm being the most common. You cut it to length, push it onto barb fittings, and secure it with clamps. It bends wherever you need it to, tolerates being rerouted after the loop is built, and forgives measurement errors. Soft tubing is the correct choice for first-time builders. It’s harder to make look pristine inside a glass-panel case, but it works reliably and assembly mistakes are easy to fix.How to Stress Test Your PC
EPDM (ethylene propylene diene monomer) rubber tubing has replaced PVC as the preferred soft tubing material in 2026. It doesn’t discolour, doesn’t kink as badly under bending, and is more resistant to the additives in modern coolants. Mayhems and EK both sell EPDM tubing in black, which is the most popular choice for clean minimal builds. Expect to spend $15-$34 for enough tubing to complete a typical loop.
Hard tubing is acrylic or PETG (polyethylene terephthalate glycol) in rigid straight lengths that you cut and heat-bend to shape. It looks exceptional inside a case when done well. It’s also unforgiving of measurement errors, if you cut a piece 5mm short, you buy another piece of tubing. Heat bending requires a heat gun, a mandrel, and practice. The first few bends on a first build will not be good. Plan for waste.
PETG is more forgiving than acrylic for beginners, it bends at lower temperatures (around 80°C versus 120°C for acrylic), doesn’t crack as easily if bent while slightly too cool, and is cheaper. Acrylic gives a crisper look when lit with UV but is genuinely difficult to work with. If you’re committed to hard tubing on a first build, use PETG. Save acrylic for your second build.Best PC Cases for Airflow 2026
Fittings: More Important Than They Look
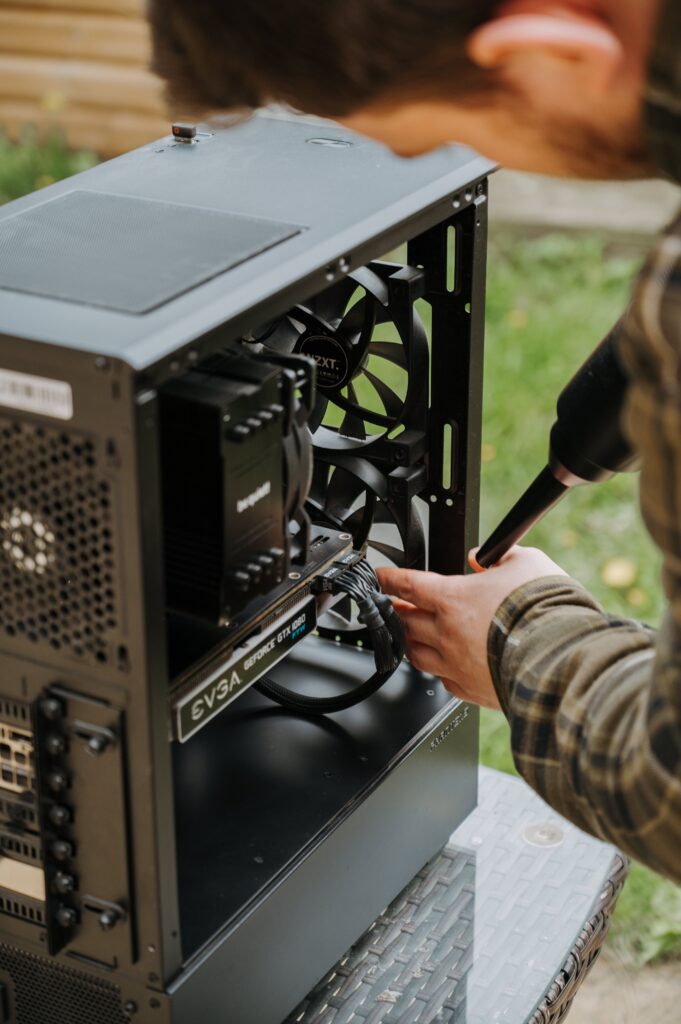
Fittings are how tubing connects to every other component in the loop. They’re also the most common source of leaks if purchased from poor-quality sources.
Compression fittings are the standard for both soft and hard tubing. They consist of a body that threads into the component port and a compression nut that tightens against the tubing to create a seal. Hand-tight plus half a turn is the correct tightening torque, overtightening cracks acrylic fittings and can strip the threads on aluminium ports.
For soft tubing, barb fittings are an alternative to compression fittings. A barb fitting is a stepped cone that the tubing pushes over, the barbs prevent the tubing pulling back off under pressure. They’re cheaper than compression fittings and work reliably with hose clamps. Less visually polished, but perfectly functional.
Rotary fittings, compression fittings with a body section that rotates independently of the connection threads, are worth buying for any fitting going into a port with a fixed orientation. They let you rotate the tubing run after the fitting is installed, which is genuinely useful when routing soft tubing around components.How to Monitor GPU and CPU Temperatures
Buy fittings from EK, Alphacool, Bitspower, or Barrow. All make quality fittings with consistent thread tolerances. Avoid unbranded fittings from marketplace sellers, fitting failures are rare with quality brands and common with cheap alternatives.
Ports on water blocks, radiators, and reservoirs typically use G1/4 BSP thread, the de facto standard across the entire custom cooling industry. If a product says G1/4, standard fittings fit it.
Budget $5-$10 per fitting. A typical CPU loop needs 8-12 fittings. A dual-radiator CPU and GPU loop needs 14-20. It adds up.
Coolant: What’s Actually Flowing
Distilled water with a biocide additive is the correct coolant for custom loops. Nothing else.
Not tap water. Tap water contains minerals that deposit inside your loop, block the fine channels in water blocks, corrode copper and nickel surfaces, and promote biological growth. A loop filled with tap water will fail, it’s a matter of when, not if.
Not pure distilled water either. Distilled water is biologically clean at bottling but will grow algae and bacteria given time, heat, and organic material. Add a biocide or anti-algae agent. Mayhems Biocide and EK CryoFuel Clear are both well-proven options.

Pre-mixed coolants like Mayhems X1 and EK CryoFuel come ready to use and include dyes if you want colour. They last 12-18 months before needing replacement. Straight distilled water with a biocide added lasts 6-9 months and costs less. Either approach works. The critical rule: never mix copper and aluminium components in the same loop. Galvanic corrosion between dissimilar metals produces deposits that clog channels and destroy components. Your radiator, water block, and fittings must all be copper, brass, or nickel-plated copper. No aluminium in a copper loop.
Coloured dyes are a personal choice. UV-reactive fluids look dramatic under UV lighting. Opaque white coolant is very popular in 2026 white builds. Pastel coolants look great initially and settle out over time, depositing colour throughout the loop. If you want colour, use a clear coolant with lighting rather than a pastel fluid. It’s less maintenance and the loop components stay cleaner longer.
Planning the Loop: Route Before You Buy
The order in which coolant flows through your loop affects temperatures. Not dramatically, but measurably.
The rule is simple: coolant should pick up heat from components before it reaches the radiator, not after. The pump pushes coolant out of the reservoir, through the water blocks (CPU, then GPU if you have both), then through the radiator, then back to the reservoir. The reservoir returns coolant to the pump inlet.
In practice, the full sequence for a CPU and GPU loop looks like this: reservoir outlet to pump inlet, pump outlet to CPU block inlet, CPU block outlet to GPU block inlet, GPU block outlet to radiator inlet, radiator outlet to reservoir inlet. Every fitting in that chain needs to be planned before you buy tubing lengths.
Dry fit everything before you fill the loop. Put every component where it’ll live in the case, trace your intended tubing runs, measure the lengths you need, and account for gentle bends in soft tubing. Add 20% to every measurement for soft tubing, it’s always better to have too much and trim than to discover a run is 30mm short after you’ve cut it.
If you have two radiators, run them in series, coolant flows through both before returning to the reservoir. Running radiators in parallel (splitting flow between them) reduces flow rate through each radiator and typically performs worse than series at standard pump speeds.
Building the Loop: The Actual Process
Step one: install your components without water in the loop. Mount the pump, reservoir, radiators, and water blocks in the case. Route your tubing dry. Check that every fitting hand-tightens properly and that there are no obvious routing conflicts with other components.
Step two: install fans on radiators. Push vs pull matters more on thick radiators than thin ones. For a 30mm radiator, either configuration works similarly. For a 45mm+ radiator, push-pull (fans on both sides of the radiator) drops temperatures 3-5°C at the cost of significantly more fan noise if you run them at speed. A single set of fans on intake is adequate for most builds at moderate speeds.
Step three: run the pump dry for 30 seconds. Don’t do this. Even a few seconds of dry operation can damage the pump’s ceramic shaft bearing. Skip straight to filling.
Step four: fill and bleed. Remove the reservoir fill port cap. Use a syringe or squeeze bottle to fill the reservoir about two-thirds full with coolant. Replace the cap. Power on using a PSU jump cable (a paper clip or dedicated jumper bridging the green and any black wire on the 24-pin ATX connector) so the pump runs without the system posting. This lets you run the pump without risking components if there are leaks.
The pump will push coolant around the loop and air bubbles will move toward the reservoir. The coolant level in the reservoir will drop. Top it up. Repeat. It takes time, budget 30-60 minutes for a first fill. Tilt the case gently in different directions to help bubbles migrate toward the reservoir. You’ll hear the pump cavitating when air is moving through it. This is normal during bleeding. When the sound becomes consistent and smooth, the major air has cleared.
Step five: leak test for 24 hours. Paper towels under every fitting. Pump running continuously. Don’t install your CPU or GPU yet, if a fitting leaks overnight, you want the coolant on paper towels, not on your motherboard. Check every fitting at 30 minutes, 2 hours, and 12 hours. If you see coolant on the towels, identify and fix the source before proceeding.
Step six: thermal paste and final assembly. Once the loop is leak-tested and dry, apply thermal paste to your CPU, mount it, install your GPU water block if included, and complete the system build. Power on normally.
What Everything Costs

A realistic CPU-only custom loop in 2026 using quality components:
CPU water block (EK-Quantum Velocity² AM5): $85. D5 pump and reservoir combo (EK-Quantum Kinetic D5): $278. One 360mm radiator (EK CoolStream SE 360): $109. 12x compression fittings at $8 each: $96. Soft EPDM tubing: $25. Coolant (Mayhems X1 pre-mixed): $20. Three 120mm fans for the radiator (Noctua NF-A12x25): $90.
Total: approximately $711.
A dual-radiator CPU and GPU loop adds a GPU water block ($180-$250), a second 360mm radiator ($109), additional fittings ($50), and three more fans ($90). That’s another $390-$460 on top, putting a full CPU and GPU loop at $880-$950 for quality components without RGB.
A 360mm AIO like the EK-AIO 360 D-RGB costs $130-$150 and delivers excellent CPU cooling in a single purchase with zero maintenance. If the question is whether custom water cooling is worth the cost, the answer is: only when you have a specific thermal problem that an AIO can’t solve.
The Honest Trade-offs
Custom water cooling is quieter than AIO under sustained load if you buy enough radiator surface. It’s louder than AIO if you don’t and have to compensate with fan speed.
It keeps components cooler than air cooling in most configurations. The performance benefit to the CPU, in terms of sustained boost clocks under gaming load, is real but not dramatic, typically 2-5°C lower junction temperature translates to a few MHz of additional sustained boost. Not worth $500 for clock speed gains alone.
The GPU thermal picture is more compelling. A full-coverage GPU water block on a high-TDP card like the RTX 5090 keeps junction temperatures 15-22°C lower than the stock air cooler under sustained load. That means the GPU never hits its thermal ceiling and drops clock speeds. In a build where the GPU is being fully utilised for extended periods, this performance difference is real and measurable in frame rates.
Maintenance is real. You’ll flush and refill the loop every 12-18 months depending on your coolant choice. It’s not difficult, drain via the lowest fitting, flush with distilled water, refill with fresh coolant. Budget an hour. Some builders never maintain their loops and run them for years without incident. That’s gambling on your coolant quality and biocide effectiveness. Don’t be that builder.
Leaks happen. In four years of running a custom loop, a well-built system with quality fittings should never leak. A rushed build with undertightened fittings or cheap components will. The 24-hour leak test exists for this reason. Don’t skip it.