


A reversed fan raises CPU temperatures by 4-8°C and GPU temperatures by up to 15°C. Not from a broken component or a failed cooler. From one fan facing the wrong direction. Same fans, same speeds, wrong orientation, and suddenly your PC runs noticeably hotter under load.
Most airflow guides cover the basics correctly. Front fans intake, rear fans exhaust, positive pressure reduces dust. What they skip is the specifics that actually make the difference, why fan position matters more than fan count, what mesh vs solid front panels do to your temperatures, where AIO radiators should live and why that depends on your build priorities, and what cable management has to do with GPU cooling. This guide covers all of it.
What Airflow Actually Does Inside a Case
Your CPU cooler and GPU cooler both move heat from the chip into the surrounding air. The CPU’s heatsink or AIO radiator dumps heat into the air inside the case. The GPU’s heatsink dumps heat into the air inside the case. If that air never leaves, temperatures rise continuously until the components throttle themselves to generate less heat.
Case fans don’t cool components directly. They replace the hot air inside the case with cool air from outside. The faster you can make that exchange happen, cool air in, hot air out, the lower your component temperatures stay under sustained load.
That’s why airflow direction matters more than fan count, why case choice matters more than fan brand, and why a solid front panel is a bigger thermal penalty than most people realise.
The Three Pressure Configurations
Positive pressure means more air enters the case than leaves through powered fans. Total intake CFM exceeds total exhaust CFM. The excess air exits through unsealed gaps, between panels, around cable cutouts, through grilles. Because all intake happens through your filtered front panel mounts, dust only collects on those filters. Clean your filters every two to three months and the inside of your case stays clean. This is the correct configuration for most builds.
Negative pressure means exhaust CFM exceeds intake CFM. The case acts as a vacuum, drawing air through every gap and seam in the chassis, none of which have filters. Dust accumulates on components, VRM heatsinks, GPU fans, and RAM sticks in ways that are genuinely difficult to clean without disassembly. Negative pressure can produce marginally lower temperatures in some specific configurations, but the dust penalty compounds over months. Six months into negative pressure operation, a clogged GPU heatsink produces higher temperatures than a clean positive-pressure system would have, so skip it.
Neutral pressure means intake and exhaust match perfectly. It works well, but it’s hard to achieve in practice because CFM ratings on fans are measured in open air, actual CFM drops when a fan is mounted against a filter or radiator. What you calculate as neutral is usually slightly positive or negative in reality. Don’t stress about hitting neutral precisely. Slightly positive is your target.
The practical number: aim for 10-20% more intake CFM than exhaust CFM. If your three 140mm front intake fans collectively move 210 CFM, your rear and top exhaust fans should move 170-190 CFM total. The gap keeps pressure positive without creating enough overpressure to make the intake fans work against themselves.
Fan Positions: What Goes Where and Why
Front fans: intake. Always.
Front fans are the most important position in a standard ATX mid-tower. They draw cool ambient air directly across the GPU first, then toward the CPU cooler at the rear of the case. The GPU is typically the hottest component in a gaming PC and benefits most from direct fresh-air supply.
Two or three 140mm fans across the front is the correct configuration for any mid-range or higher build. Three 140mm fans at 800 RPM move more air with less noise than three 120mm fans at 1200 RPM, larger diameter means more air per revolution, so you achieve the same CFM at lower speed and lower noise. If your case only fits 120mm front fans, three 120mm fans is still the correct number for a high-TDP build.Best PC Cases for Airflow 2026
Rear fans: exhaust. Always.
One 120mm fan at the rear pushes hot air out directly behind the CPU cooler. It’s the clearest exhaust path in most cases and the one position that every mid-tower supports. Don’t flip this fan to intake thinking more fresh air is better, air entering from the rear would flow toward the front of the case, directly against your front intakes, creating turbulence and reducing overall airflow efficiency.
Top fans: usually exhaust, sometimes intake for AIOs.
Heat rises, so top exhaust fans take advantage of convection to pull hot air out, supplementing the rear exhaust fan and creating the front-to-back, bottom-to-top airflow path that works best in most cases.
One or two 120mm or 140mm fans at the top exhausting works well for most builds. The exception is if you’re mounting an AIO radiator at the top. And here’s where the decision splits.
AIO Radiator Placement: The Decision That Matters

Mounting an AIO radiator at the top as exhaust is the most common configuration and the one most build guides default to. The radiator pulls cool air through its fins from inside the case, heats it, and exhausts it through the top. CPU temperatures are excellent. Case temperatures rise slightly because the radiator is adding heat to the air before it exits, the hot air from the radiator mixes with case air for a moment before exhausting.Cooler Master HAF II 500 Review
In a typical gaming system with an RTX 5070 or below, this temperature rise inside the case is 2-4°C, which is acceptable, and GPU temperatures are not meaningfully affected.
Mounting the AIO radiator at the front as intake changes the picture. The radiator pulls cool ambient air from outside the case, passes it across the CPU cooler fins, and pushes it into the case interior. CPU temperatures run 2-4°C higher than top-exhaust because the coolant radiates heat into air that’s already warmer than ambient. GPU temperatures drop 3-5°C because the case interior is cooler, the air surrounding the GPU is closer to ambient temperature.
Which configuration is correct depends on your build. If you’re running a 9800X3D, which doesn’t run especially hot under gaming load, with an RTX 5080 or 5090 that does, front intake is the right choice. The cooler GPU temperatures matter more than the marginal CPU temperature increase. If you’re running a 9950X3D under sustained all-core workload alongside a mid-range GPU, top exhaust is the right choice. Keep the CPU as cool as possible, because it’s the component generating the most heat.
Don’t let anyone tell you one configuration is universally correct. It depends on what you’re running.
Fan Orientation: The Mistake That Costs You 15°C
Every fan has two sides. One side draws air in. One side pushes air out. The sticker on the fan hub always faces the direction air is moving toward, so if the sticker faces into the case, the fan is an intake. If the sticker faces away from the case, it’s an exhaust.Air Cooler vs AIO CPU Cooler 2026
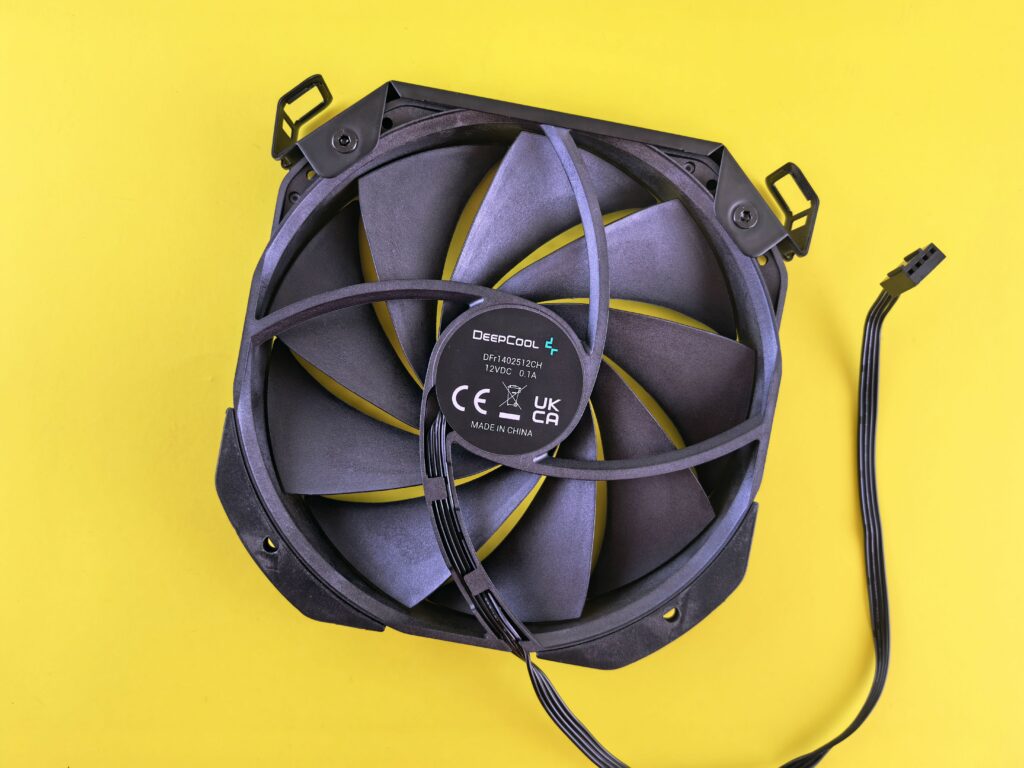

Get this wrong on a front intake fan and you’ve turned a 60 CFM intake into a 60 CFM exhaust, hot air blowing out the front panel while the inside of your case starves for fresh air. GPU temperatures rise 10-15°C. CPU temperatures rise 4-8°C. The PC sounds normal, fans spin normally, and there’s no error message, just elevated temperatures that throttle your performance and shorten component lifespan.
Before finalising any build or re-checking an existing one, power the system off, hold a small piece of paper or your finger near each fan, and confirm air direction. Front panel: air should blow inward. Rear and top: air should blow outward.
Fan Count Recommendations by Build Tier
Budget build (GTX 1660 Super / RTX 5060 tier, 65W CPU): Two 120mm or 140mm front intake fans plus one 120mm rear exhaust fan. Three fans total. This is the minimum for adequate airflow. CPU under load with a quality tower cooler: 65-75°C delta from ambient. GPU under gaming load: 70-80°C.
Mid-range build (RTX 5060 Ti / RX 9070 tier, 65-125W CPU): Three 120mm or 140mm front intake fans plus one 120mm rear exhaust and one 120mm or 140mm top exhaust. Five fans total. CPU delta under gaming load: 55-70°C. GPU under sustained gaming: 70-80°C with a well-ventilated case.
High-end build (RTX 5080 / 5090 tier, 9950X3D or Core Ultra 9 tier): Three 140mm front intake fans plus one 120mm rear exhaust and two 140mm top exhaust fans plus bottom intake if the case supports it. Six to seven fans total. At this tier, case choice matters as much as fan count, a mesh-front case like the Phanteks EX5 or Cooler Master HAF II 500 outperforms a glass-front case by 5-8°C on average GPU temperatures regardless of how many fans you install.
The Fan Brands Worth Buying
This is where most guides get diplomatic and list ten options. Don’t do that. Buy Noctua, Arctic, or be quiet! and stop thinking about it.Custom Water Cooling Guide
Noctua NF-A14 PWM (140mm): 82.5 CFM, 24.6 dB at max speed. The benchmark for quiet airflow fans. Expensive at $30-$37 each. Worth it for a system you want to be genuinely quiet.Noctua NF-A14 PWM

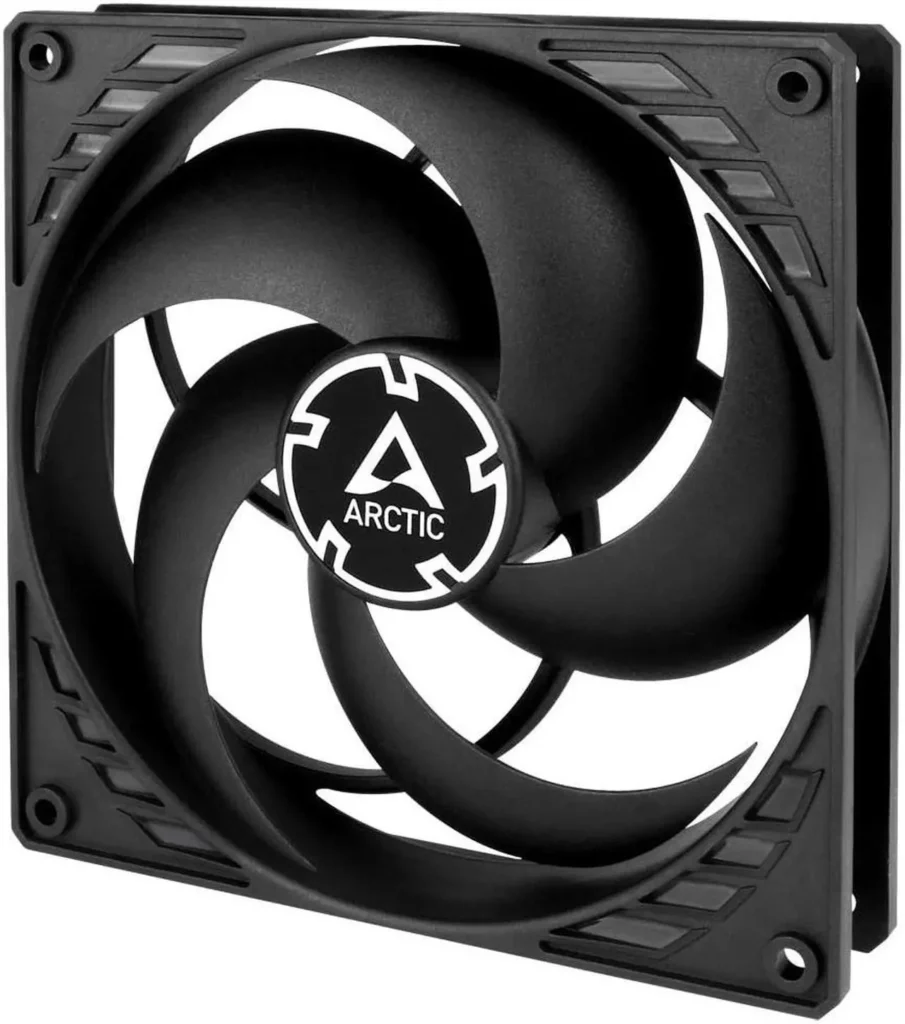
Arctic P14 PWM (140mm): 72.8 CFM, 0.5 dB at minimum speed, 22.5 dB at max. One-third the price of the Noctua. Slightly lower CFM but the performance per dollar is exceptional. The correct choice if you’re buying six fans and don’t want to spend $180 on case fans alone.Arctic P14 PWM($27)
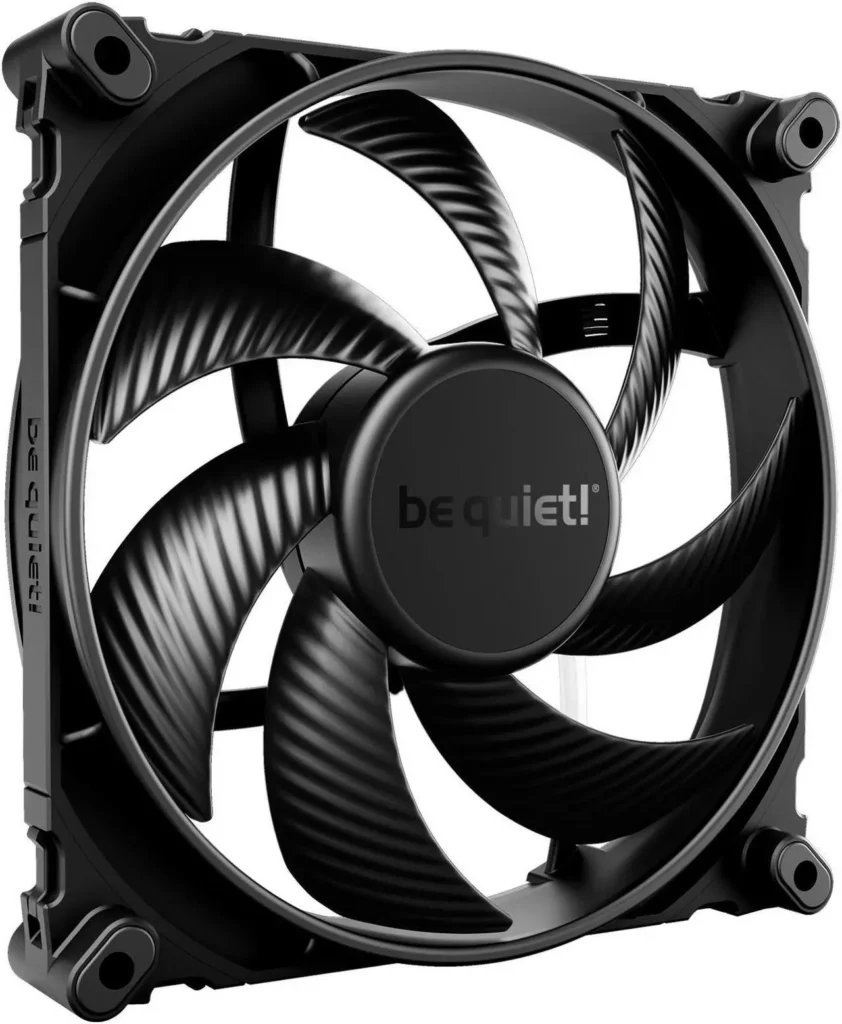
be quiet! Silent Wings 4 (140mm): 81.9 CFM, among the quietest fans at any given RPM. The Silent Wings 4 at 1000 RPM is nearly inaudible and moves meaningful airflow. Good for builds where acoustic performance is the priority.be quiet! Silent Wings 4 ($26)
For radiator-mounted fans specifically, choose high-static-pressure variants rather than high-airflow fans. The Noctua NF-A12x25 (120mm) and NF-A14 industrialPPC are the standards here. High-airflow fans optimised for open spaces lose effectiveness against the resistance of a radiator’s dense fin stack, you need a fan that maintains pressure against restriction, not just moves volume in open air.
What Cable Management Has to Do With Airflow
More than most people expect. A bundle of power cables running across the front of the GPU intake restricts the air reaching the GPU heatsink. Depending on cable diameter and routing, this restriction raises GPU temperatures 3-7°C. Not from a blocked fan, from restricted airflow reaching the fan intakes.
Route all cable bundles through the motherboard tray’s cable management cutouts. Keep the GPU’s immediate airspace as clear as possible. The 24-pin ATX cable, EPS CPU power cable, and PCIe power cables are the main offenders, all are bulky and commonly routed across the front of the case in builds that prioritise speed over cable discipline.How to Cable Manage Your PC
A clean cable route doesn’t just look better. It measurably lowers your GPU temperature under sustained load. For a high-TDP card pushing 300-400W, a 5°C temperature reduction from better cable routing keeps the card running above its thermal limit less frequently, which means slightly better sustained performance in GPU-bound workloads.Corsair Warthog Case Review
Clean up the cables before blaming the fans.
The Dust Filter Reality
Dust filters are the unsung hero of positive-pressure airflow. With filters on all intake positions and slightly more air entering than leaving, dust collects on the filter surface rather than depositing on your GPU fans, VRM heatsinks, and RAM sticks.How to Monitor GPU and CPU Temperatures

Clean your intake filters every two to three months depending on how dusty your environment is. A clogged filter restricts airflow more than most people realise, a filter that’s 40% clogged reduces the effective CFM of the fan behind it by a similar percentage. The thermal penalty of a neglected filter compounds over months. Clean them regularly and your temperatures stay consistent.
Cases without dust filters on front intakes, some budget cases, some glass-front designs, force you to clean internal components more frequently. If dust management is a priority for you, add a magnetic filter sheet cut to size, available from several PC accessory brands on Newegg for under $15.
The Quick Reference
Front fans: intake, always. Three 140mm if your case fits them.
Rear fans: exhaust, always. One 120mm or 140mm.
Top fans: exhaust for CPU temperature priority, intake via AIO radiator for GPU temperature priority.
Pressure: slightly positive. One more intake than exhaust as a minimum.
Fan direction: sticker faces the direction air travels toward.
Cable management: route away from GPU airspace before adjusting fan speeds.
Dust filters: clean every two to three months without fail.
If your temperatures are higher than they should be and your fans are running correctly, check cable routing before buying more fans. Nine times out of ten, the airflow path is obstructed somewhere that more fans won’t fix.