
SpecClear earns a commission if you buy through Newegg links on this page, at no extra cost to you.
OBS Studio is free. It’s been the standard streaming software for over a decade. Every major streamer on Twitch and YouTube uses a version of it. And the first time you open it, the interface looks like the cockpit of a commercial aircraft.
Scenes. Sources. Audio Mixer. Transitions. Studio Mode. None of it is labelled in a way that tells you what order to do things in or why any of it matters. Most guides jump straight into bitrate settings before explaining what a scene is. This one doesn’t.
Start here. By the end you’ll have OBS configured, a stream set up on Twitch or YouTube, and know exactly what to press to go live.
Step 1: Download and Install OBS
Go to obsproject.com. Download the installer for your operating system, Windows, macOS, or Linux. Run the installer and accept the defaults. Launch OBS.
The first time OBS opens, it presents an Auto-Configuration Wizard. Don’t skip it. Choose “Optimise for streaming” and let it run. The wizard tests your machine’s CPU capability and your internet upload speed, then suggests a resolution, frame rate, and bitrate that your system can actually handle. Accept those suggestions as your starting point, you can refine them later, but starting with settings your hardware can sustain is more important than starting with the highest possible quality.
If the wizard doesn’t appear automatically, go to Tools → Auto-Configuration Wizard in the top menu bar.

Understanding the OBS Interface: What Everything Is
Before touching any settings, understand what you’re looking at. The OBS interface has five main areas and each one has a specific job.

Scenes (bottom left): A scene is a complete layout, everything visible on stream at a given moment. You’ll have multiple scenes: one showing your gameplay, one showing a “Be Right Back” screen, one showing an intro countdown. You switch between scenes while you’re live. Think of scenes as channels on a television, you switch between them and the viewer sees whatever is in the current scene.
Sources (bottom centre): Sources are the individual elements inside a scene. A scene can contain multiple sources: your game capture, your webcam feed, your microphone, overlay graphics, and background images. Sources stack on top of each other, the order matters, just like layers in Photoshop. Whatever is higher in the sources list appears in front of whatever is lower.
Audio Mixer (bottom centre-right): This controls your audio levels. You’ll see at minimum two channels: Desktop Audio (everything your PC produces, game sounds, music, Discord) and your microphone. The coloured bars show you how loud each source is. Green is good. Yellow is getting loud. Red means you’re clipping, distorting. Keep your microphone in the green-to-low-yellow range. For the hardware side, see our streaming and content creator setup guide.
Scene Transitions (bottom right of centre): Controls how OBS moves between scenes, fade, cut, stinger. Fade is the clean default. Most streamers leave this alone until they want to polish their production.
Controls (far bottom right): Start Streaming, Start Recording, Studio Mode, Settings. This is where you go live.
Step 2: Set Up Your Stream Connection
Before building scenes, connect OBS to your streaming platform. This is how OBS knows where to send your video.
For Twitch:
Open Settings (cog icon at the bottom right). Click the Stream tab. Set Service to Twitch. Click “Connect Account”, this is easier and more secure than copying a stream key. Log into Twitch in the browser window that opens and authorise OBS. OBS will store your credentials and unlock Twitch-specific features like the built-in chat dock. Click Apply and OK.

If you prefer to use a stream key instead: go to your Twitch dashboard → Settings → Stream Key and copy it. Paste it into the Stream Key field in OBS Settings → Stream.
For YouTube:
YouTube requires you to enable live streaming on your channel before OBS can connect to it. Go to YouTube Studio → Settings → Channel → Feature Eligibility → enable Live Streaming. This takes up to 24 hours to activate on new channels, don’t leave this until the day you want to go live.
Once live streaming is enabled: go to YouTube Studio → Go Live → Stream → copy the Stream Key. In OBS Settings → Stream, set Service to YouTube RTMPS and paste the stream key. Click Apply and OK.
One important YouTube note: every time you go live on YouTube, a new stream key is generated. If you use stream keys rather than connecting via account, you need to copy a fresh key each session. Connecting your YouTube account through OBS avoids this.
Step 3: Configure Your Output Settings
The Auto-Configuration Wizard set these already, but understanding what they mean lets you adjust them if your stream quality isn’t right.
Go to Settings → Output. Set Output Mode to Advanced for full control.
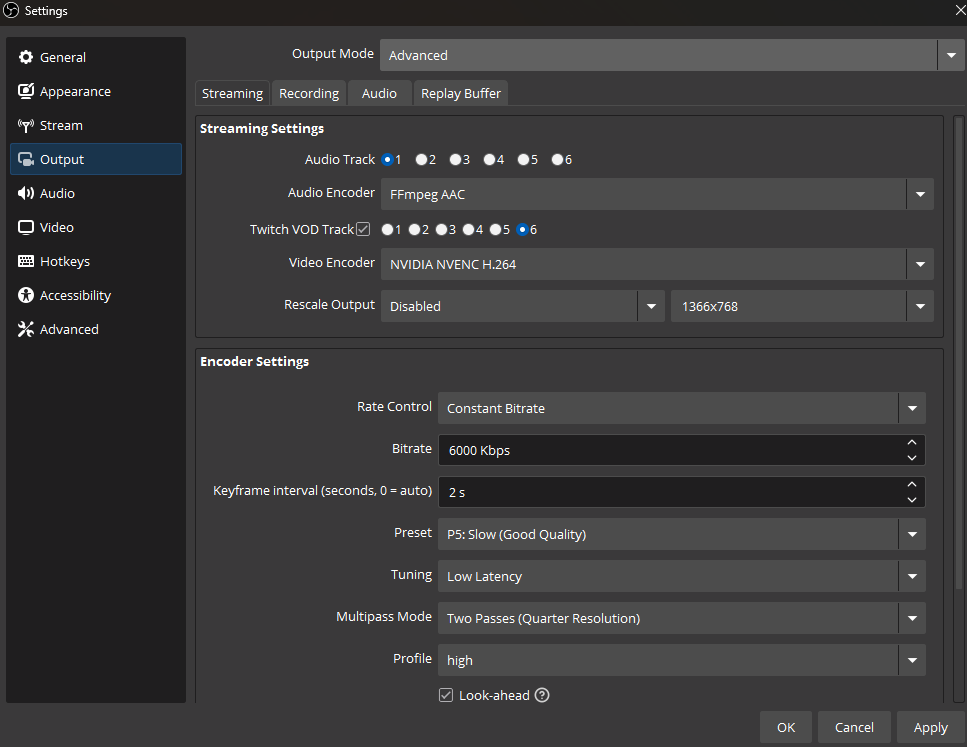
Encoder: Your first choice is between x264 (CPU encoding) and NVENC/AMF/QuickSync (GPU encoding). GPU encoding is almost always the right choice in 2026. It offloads encoding work from your CPU to your GPU, which means your game’s performance is less affected while streaming. If you have an Nvidia GPU, select NVENC H.264. AMD GPU: AMD AMF H.264. Intel integrated graphics: Intel QuickSync H.264. Only use x264 CPU encoding if your GPU doesn’t support hardware encoding or your GPU is already running at 100% in the game you’re streaming.
Rate Control: Set to CBR (Constant Bitrate). This maintains a consistent video quality throughout the stream rather than varying with scene complexity. All major platforms prefer CBR.
Bitrate: For Twitch, 6,000 Kbps is the standard maximum for non-partner streamers at 1080p60. Don’t exceed your upload speed, a 6,000 Kbps stream requires approximately 7-8 Mbps of upload headroom (bitrate plus encoding overhead plus headroom for packet loss). If your upload speed is below 10 Mbps, use 4,500 Kbps at 720p60. A stable lower-bitrate stream looks better than an unstable high-bitrate stream that drops frames.
For YouTube: up to 9,000 Kbps at 1080p60. YouTube supports higher bitrates than Twitch.
Keyframe Interval: Set to 2 seconds. This is the standard for all major streaming platforms. Don’t change it.
Go to Settings → Video. Set Base (Canvas) Resolution to match your monitor resolution, likely 1920×1080 or 2560×1440. Set Output (Scaled) Resolution to 1920×1080 for most streams, this is what viewers actually see. Set FPS to 60. Click Apply and OK.
Step 4: Set Up Your Audio
Go to Settings → Audio. Set Sample Rate to 48 kHz, this is the standard for streaming and broadcast. Set Channels to Stereo.
Under Global Audio Devices, set Desktop Audio to your PC’s default audio output, this captures game sound, music, and any other audio your PC produces. Set Mic/Auxiliary Audio to your microphone. If Windows is not using the right device, our guide to setting up PC audio walks through the sound settings.
Back in the main OBS window, check the Audio Mixer. You should see Desktop Audio and your microphone both showing level activity. Speak into your microphone, the bar should move. Play a sound from your PC, the Desktop Audio bar should move.

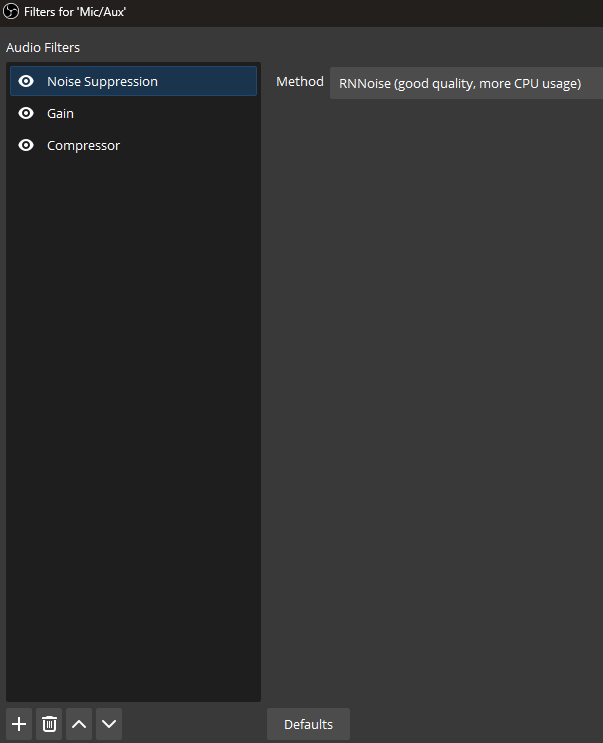
One critical setting most beginners miss: right-click your microphone channel in the Audio Mixer → Filters → click the + button → add Noise Suppression. Set Method to RNNoise. This removes background noise, keyboard clicks, fans, room hum, from your microphone signal in real time using AI. It’s free, built into OBS, and makes a noticeable difference in audio quality.
Also add a Compressor filter to your microphone. Set Ratio to 4:1, Threshold to -18dB, Attack to 1ms, Release to 60ms. The compressor reduces the dynamic range of your voice, quiet moments get boosted slightly, loud moments get pulled back, producing more consistent audio volume throughout your stream.
Step 5: Build Your Scenes
The minimum scene setup for a gaming stream is four scenes. Build these before going live.

Scene 1: Gameplay
This is your main scene, what viewers see while you’re playing. Click the + button in the Scenes box and name it “Gameplay.”
In the Sources box, click + and add Game Capture. Name it and click OK. In the Game Capture properties, set Mode to “Capture specific window” and select your game from the dropdown. This captures only the game, not your entire screen, cleaner and more reliable than Display Capture for gaming.

Click + in Sources again and add Video Capture Device. Select your webcam from the dropdown. Size and position it in the preview window, drag the corners to resize, drag the centre to reposition. Most streamers place their webcam feed in the bottom-right corner at roughly 25% of the screen width.

Click + in Sources again and add Audio Input Capture. Select your microphone. This adds your microphone as a dedicated source in the scene in addition to the global audio setting you configured, ensure it’s not doubling up by checking the Audio Mixer. If you see your microphone listed twice, remove one.

Scene 2: Starting Soon
Click + in Scenes and name it “Starting Soon.” Add an Image source, create a simple starting soon graphic in any image editor, or download a free one from Nerd or Die, Placeit, or Stream Elements. Add a text source with your stream start time if you want one. No game capture in this scene.

Scene 3: Be Right Back
Same structure as Starting Soon, an image background with BRB text. Switch to this scene when you leave the desk mid-stream.
Scene 4: Stream Ending
An image with thanks for watching messaging. Switch to this in the final 30 seconds of a stream to give chat a clear signal the stream is ending.
Step 6: Test Before Going Live
Never test on your live stream. OBS has a built-in recording function, use it.

Click Start Recording in the Controls panel. Play your game for five minutes. Stop recording. Watch the file back and check:
- Is the game captured correctly with no black screen or distortion?
- Is your microphone audible and clear?
- Is the game audio balanced against your microphone, not too loud, not too quiet?
- Is your webcam positioned correctly and in focus?
- Is there any echo, your voice coming through the Desktop Audio capture as well as the microphone?
Echo is the most common first-time setup problem. If you hear your voice twice, go to Settings → Audio and set Desktop Audio to the specific output device your headphones or speakers use. If you’re monitoring through headphones, ensure monitoring is off in the Audio Mixer, right-click your microphone → Advanced Audio Properties → set Audio Monitoring to “Monitor Off.” Elgato Wave:3 (about $190)

Step 7: Going Live on Twitch
In Twitch Dashboard (dashboard.twitch.tv), set your stream title, category, and tags before going live. This helps viewers find your stream through Twitch’s discovery system, a stream with a category set is more discoverable than one without.
In OBS, switch to your Starting Soon scene. Click Start Streaming. The status bar at the bottom of OBS turns green and shows your current bitrate and frame rate, green means the connection to Twitch is stable. A yellow or red status bar indicates dropped frames or connection issues.
Wait 30-60 seconds for Twitch’s CDN to stabilise the stream, then switch to your Gameplay scene. You’re live.
Check your stream in another browser tab (not the dashboard, your dashboard preview has significant delay). Twitch.tv/yourchannelname shows the viewer experience.
Step 7 (Alternative): Going Live on YouTube
YouTube’s live streaming workflow is slightly different from Twitch. Go to YouTube Studio → Go Live. Select Stream from the options. Set your stream title, description, category, and visibility (Public, Unlisted, or Private). If you want the stream discoverable, set it to Public.
Copy your Stream Key and ensure it’s pasted into OBS Settings → Stream (if you’re not using account connection). Click Create Stream. YouTube will show a preview screen, the stream hasn’t started yet.
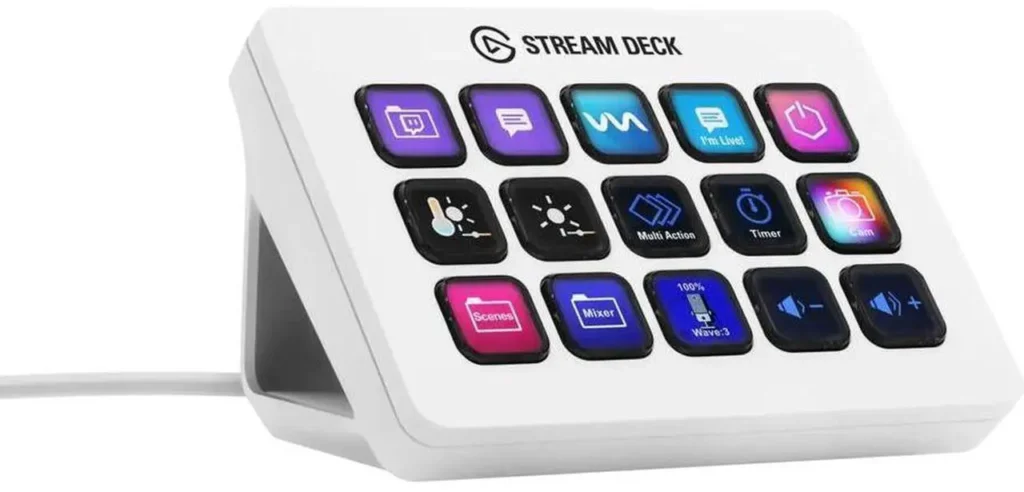
In OBS, click Start Streaming. Wait for YouTube Studio to show “Preview” status, this means YouTube is receiving your video but not broadcasting it to viewers yet. Check the preview in YouTube Studio to confirm the video and audio look correct. An Elgato Stream Deck MK.2 (about $150, currently out of stock on Newegg) lets you start and stop the stream with one button.
When you’re ready: click “Go Live” in YouTube Studio. The stream starts from that moment. YouTube doesn’t broadcast until you explicitly click Go Live, you can keep OBS running in preview mode indefinitely while you check your setup.
Common Problems and How to Fix Them
Black screen on Game Capture: Right-click the Game Capture source → Properties → try switching Mode to “Capture any fullscreen application.” If still black, run OBS as administrator, right-click OBS icon → Run as Administrator. Some games require elevated permissions for capture.
Dropped frames: Lower your video bitrate by 500 Kbps and monitor the status bar. If drops continue, switch to a closer Twitch server: Settings → Stream → Server → select the nearest geographic option manually rather than Auto.
Echo: Disable monitoring on your microphone in Advanced Audio Properties. Check that Desktop Audio isn’t capturing your microphone through your system audio device.
Microphone not appearing in OBS: Go to Settings → Audio → confirm the correct microphone is selected. If using a USB microphone plugged in after OBS launched, close and restart OBS.
High CPU usage while streaming: Switch from x264 to GPU encoding (NVENC, AMF, or QuickSync). If already on GPU encoding, lower your output resolution from 1080p to 720p and see if CPU usage drops.