
PC audio is one of those things that should just work and often doesn’t. You plug in a headset, Windows picks a random output device, your headset software opens and enables six processing effects simultaneously, Dolby Atmos tries to activate on top of that, and the result is audio that sounds muddy, echoes slightly, or has a strange artificial quality you can’t quite identify.
The good news is that fixing it is straightforward once you understand what each layer does and how they’re supposed to work together. This how to set up pc audio guide explains every part of the chain from Windows sound settings to headset software to spatial audio, what each one controls, and how to set them up so they complement rather than fight each other.
Understanding the audio chain — what’s actually happening
Sound on a PC travels through several processing stages between the game and your ears. Understanding this chain is the single most useful thing you can take away from this guide, because most audio problems happen when two stages are trying to do the same job simultaneously.
The chain looks like this:
Game audio engine → Windows audio engine → Headset software or DAC → Drivers/hardware → Your ears
At each stage, processing can be added equalisation, virtualisation, volume normalisation, spatial effects. When you add the same type of processing at two stages say, spatial virtualisation in both Windows Sonic and your headset software simultaneously the effects stack in ways that produce unnatural, overprocessed audio. The goal is to decide which stage handles which job and turn off duplicates everywhere else.
Step 1 — Set the correct default playback device in Windows
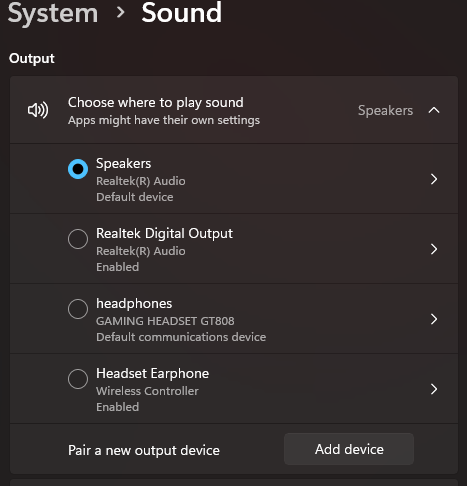
Open the Windows Sound settings. The fastest way: right-click the speaker icon in the taskbar → Sound settings. Alternatively Windows key + I → System → Sound.
Under Output, you’ll see a list of available audio devices. If you have a USB headset or DAC, it appears as its own device. If you have a 3.5mm headset plugged into your motherboard’s audio jack, it typically shows as your motherboard’s audio chipset Realtek HD Audio or similar.
Set your headset or preferred output as the default device. This sounds obvious but Windows frequently defaults to your monitor’s HDMI audio output when a display is connected, particularly after driver updates or hardware changes. If you’re hearing audio from your monitor’s speakers rather than your headset, this is why.Best Gaming Headset Under $100 2026
Click on your output device and select Device properties. Here you’ll find the sample rate and bit depth setting typically 24-bit, 48000Hz (Studio Quality) is the correct setting for gaming headsets. 16-bit is fine but 24-bit gives the audio engine more headroom for processing without clipping. Rates above 48000Hz (96kHz, 192kHz) offer no benefit for gaming audio and can introduce compatibility issues with some games.
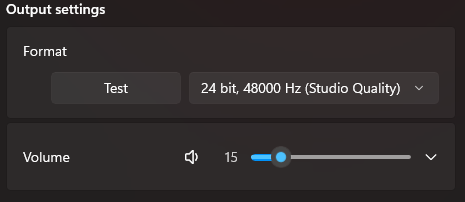
Step 2 — Check and adjust the Windows audio enhancements
Still in Device properties, click Additional device properties (or in older Windows builds, go to the Enhancements tab). Here you’ll find Windows-level audio processing effects bass boost, virtual surround, loudness equalisation, room correction.
The default recommendation: turn all of these off. Every one of these effects will almost certainly be replicated more accurately by your headset software, and having both active simultaneously produces the muddy, artificial sound quality that makes PC audio frustrating.
The one exception is Loudness Equalisation a volume normalisation effect that reduces the dynamic range between quiet and loud sounds. Some players find this useful in competitive games where hearing quiet footsteps matters as much as hearing explosions. It’s a personal preference rather than a technical recommendation, but it’s the one Windows enhancement worth evaluating before disabling.
Step 3 — Understand what your headset software actually does
Most gaming headsets above $50 come with companion software SteelSeries GG, Razer Synapse, HyperX NGENUITY, Corsair iCUE, ASUS Armoury Crate, Logitech G Hub. These applications control several distinct functions that are worth understanding separately.
Equalisation (EQ) adjusts the frequency balance of your audio boosting bass, reducing harsh highs, tuning midrange for voice clarity. This is genuinely useful and is where headset software adds real value. Most manufacturers provide preset EQ profiles Gaming, Music, Movie, Esports as starting points. If you’re not sure where to begin, the Esports or FPS preset typically boosts mid-frequencies where footsteps and voice communication sit, while reducing some bass that can mask directional cues.
Microphone settings
control your microphone’s input gain, noise cancellation, sidetone (hearing your own voice in your headset), and EQ. These are headset-specific and should be managed here rather than in Windows.
Surround sound virtualisation in headset software simulates multiple audio channels through two drivers the stereo left and right channels in your headset to create a sense of directionality. This is where most of the confusion happens, covered in detail below.
Volume mixing in some software lets you independently adjust game audio, chat audio, and music a useful feature for streaming or content creation.ASUS ROG Gjallar Gaming Soundbar
The important principle: only enable the processing features you actually want to use. Opening headset software and enabling every available effect because they’re there produces worse audio than using a small number of well-chosen effects.
Step 4 — Spatial audio: Windows Sonic, Dolby Atmos, and headset virtualisation — pick one
This is the section where most PC audio problems originate. Spatial audio virtualisation creating a sense of three-dimensional sound through stereo headphones is offered by Windows Sonic (free, built into Windows 11), Dolby Atmos for Headphones (paid, around $15 one-time), DTS:X Ultra (paid), and most headset software’s own surround sound implementation.
All of these are trying to do the same thing: make stereo audio feel like it’s coming from specific directions around you. Running more than one simultaneously doesn’t make it more directional it makes it sound processed, unnatural, and often worse than stereo.
How to enable spatial audio in Windows:
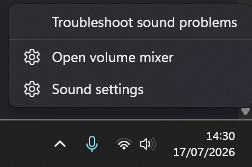
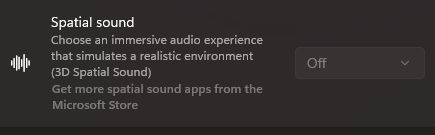
Right-click the speaker icon in the taskbar → Spatial sound → choose Windows Sonic for Headphones, Dolby Atmos, or DTS:X Ultra. This replaces the audio Windows sends to your headset with virtualised spatial audio.
The correct setup:
If you want to use Windows Sonic: enable it in Windows spatial audio settings. Turn off surround sound in your headset software.
If you want to use Dolby Atmos: purchase and install the Dolby Access app from the Microsoft Store, enable Dolby Atmos in Windows spatial audio settings. Turn off surround sound in your headset software.
If you want to use your headset software’s surround sound: keep Windows spatial audio set to Off. Enable surround in your headset software only.
Never run both Windows spatial audio and headset software surround simultaneously. The output becomes double-processed and sounds distinctly artificial.
Which spatial audio option is actually best?
For competitive gaming CS2, Valorant, Apex Legends where hearing exactly which direction a sound is coming from matters: stereo with good headphones is often better than any virtualisation. Spatial virtualisation makes audio feel more immersive but can soften precise directional cues. Many competitive players run stereo only.Windows 11 Gaming Optimisation Settings Guide
For single-player atmospheric games, RPGs, and narrative titles: Dolby Atmos is the most polished implementation. It produces a convincing sense of height and distance that Windows Sonic approaches but doesn’t quite match. The $15 one-time purchase is worth it for this use case.
Windows Sonic is a reasonable free alternative that works well across most games. If you’re unsure whether spatial audio is worth pursuing, Windows Sonic is the correct starting point it costs nothing and can be disabled in one click if you prefer stereo.
Step 5 — In-game audio settings
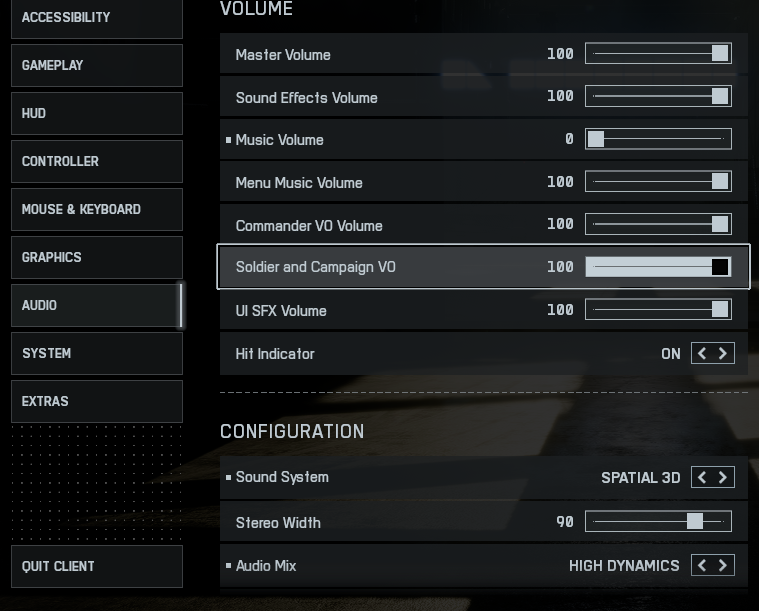
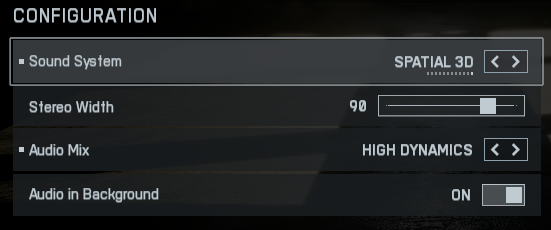
Most modern games have their own audio settings including output device selection, audio quality, and sometimes spatial audio configuration. Check these after setting up Windows and your headset software.
Set the in-game output device to the same device you set as default in Windows or leave it on System Default to follow the Windows setting automatically.
If a game has its own surround sound or spatial audio setting Cyberpunk 2077’s spatial audio toggle, for example treat this the same way as headset software surround. Running the game’s spatial audio alongside Windows Sonic or Dolby Atmos double-processes the same virtualisation effect. Pick one source for spatial audio and leave the others off.
Audio quality settings in games typically control sample rate and compression set these to the highest available option your system can handle. On any gaming PC built in the last five years, High or Ultra audio quality has no meaningful performance impact.
Step 6 — Microphone setup
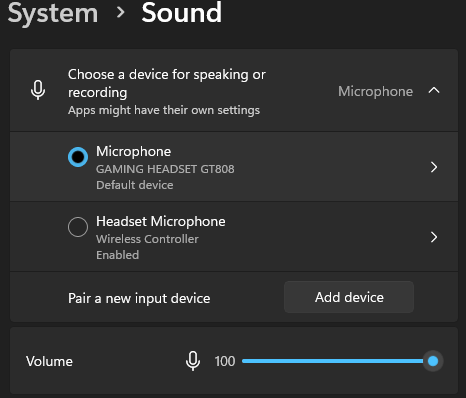
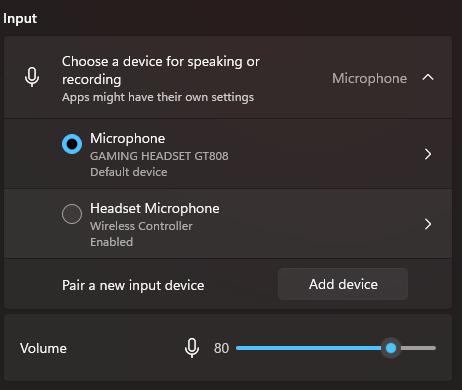
Open the Sound settings Input section and select your headset microphone as the default input device. Check the microphone level Windows defaults to 100% input which is often too high for gaming headset microphones and produces clipping distortion when you speak loudly. 70-80% is a better starting point.
In your headset software, look for the noise cancellation setting. Most gaming headsets include some form of microphone noise reduction that filters background sounds keyboard noise, fan noise, ambient room sound. Enable this and adjust the threshold so your voice comes through clearly while background noise is reduced.How to Monitor Your PC Gaming Performance
Sidetone hearing your own voice through your headset is a personal preference setting. Some people find it helps them modulate their voice volume naturally. Others find it distracting. Adjust to whatever feels comfortable.
If teammates are reporting that your microphone sounds distorted or too loud, check both the Windows input level and your headset software’s microphone gain. Both control input volume independently and both need to be set correctly.
Step 7 — When using external speakers instead of a headset
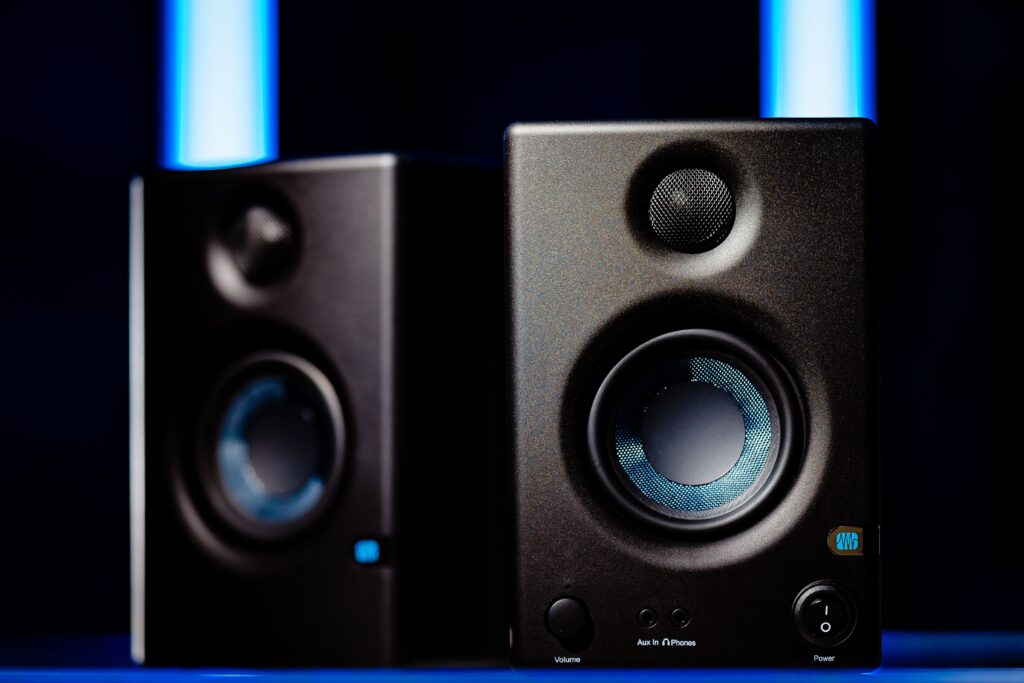
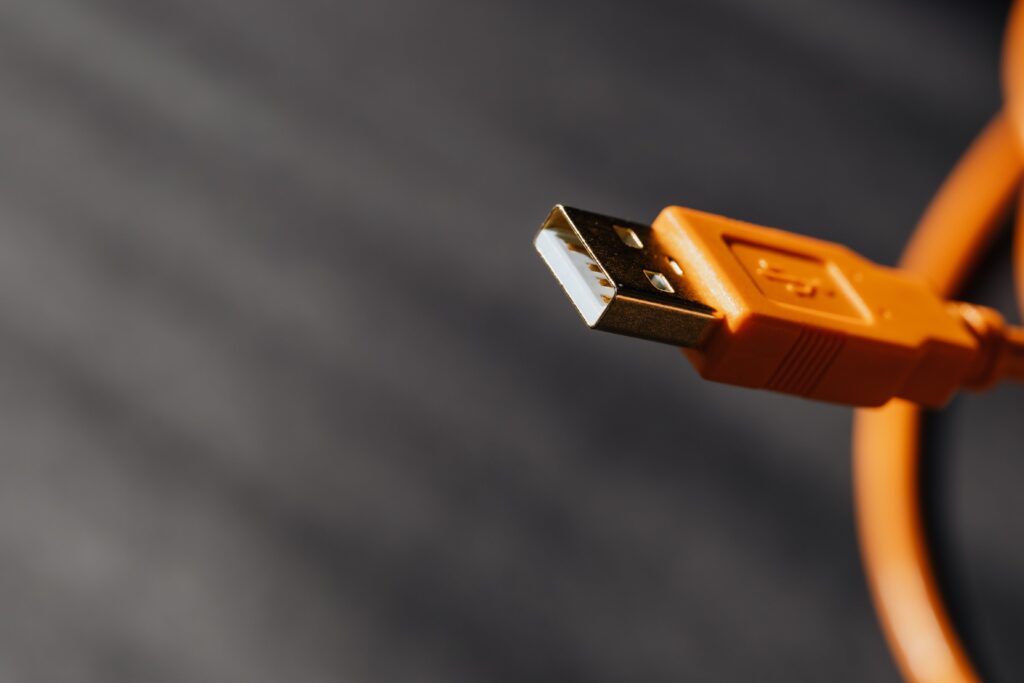
External speakers connected via USB or 3.5mm follow the same Windows output device setup as a headset. Set them as the default device, disable Windows audio enhancements, and leave spatial audio off spatial virtualisation is specifically designed for headphone playback and produces no benefit through physical speakers.
If you’re using the ASUS ROG Gjallar soundbar or a similar 2.1 gaming speaker system connected via HDMI, the connection routes audio through your monitor rather than directly to Windows. In this case your monitor becomes the audio device in Windows output settings rather than the soundbar appearing directly. Check the HDMI audio passthrough settings in both your monitor’s OSD and the soundbar’s input selector to ensure audio is routing correctly to the soundbar rather than the monitor’s built-in speakers.

For Dolby Atmos content through a soundbar with upward-firing drivers, enable Dolby Atmos in Windows spatial audio settings the same way as headphones. The soundbar’s own processing handles height virtualisation from there — turn off any additional Windows enhancements.
The quick reference checklist
Set correct default output device in Windows → confirmed.
Sample rate: 24-bit, 48000Hz → confirmed.
Windows audio enhancements: off (except Loudness Equalisation if desired) → confirmed.
Headset software EQ: one preset enabled, others off → confirmed.
Spatial audio: one source only — Windows Sonic, Dolby Atmos, or headset surround. Never two simultaneously → confirmed.
In-game audio: System Default output, spatial audio off if using Windows or headset virtualisation → confirmed.
Microphone level: 70-80% in Windows, noise cancellation enabled in headset software → confirmed.
If audio still sounds off after following these steps, the most common remaining cause is a driver conflict between your motherboard’s built-in audio chipset and a USB headset. Open Device Manager, find Sound, Video and Game Controllers, and check whether both your motherboard audio driver and your USB headset appear correctly without error flags. A clean driver reinstall for either device resolves most persistent issues that settings changes don’t fix.